Developing & Testing Your Shiny Application
Addenda
Martin Frigaard (Atorus)
Additional slides
These are slides that didn’t make the cut (either due to time or relevance), but the branches exist in the moviesApp repository and they are covered in the Shiny App-Packages book.
Outline
Launching apps
shinyApp()shinyAppDir()runApp()
Debugging
browser()&observe()reactiveValuesToList()
Tests
Snapshots
Test mocks
Launching apps
Branch: 08_launch-app
In the 08_launch-app repo, multiple functions are used to launch the application in moviesApp.
The following slides discuss the differences between these functions (and why you’d use one over the other).
This topic is covered extensively in this blog post from ThinkR.
Launching apps: shinyApp()
Branch: 08_launch-app
What happens when we call shinyApp()?
shinyApp()creates and launches an app defined inline (or with UI and server function arguments)
Launching apps: shinyAppDir()
Branch: 08_launch-app
What happens when we call shinyAppDir()?
Launching apps: runApp()
Branch: 08_launch-app
What happens when we call runApp()?
Debugging
In Shiny apps, the debugger can be a powerful tool for investigating error messages and server-side code.
Function execution is paused while we’re in browser mode, which allows us to inspect the variables in the current environment.
The following slides cover two methods for debugging Shiny functions:
Wrapping
browser()in a call toobserve()Capturing reactive values with
reactiveValuesToList()and sending output to the UI
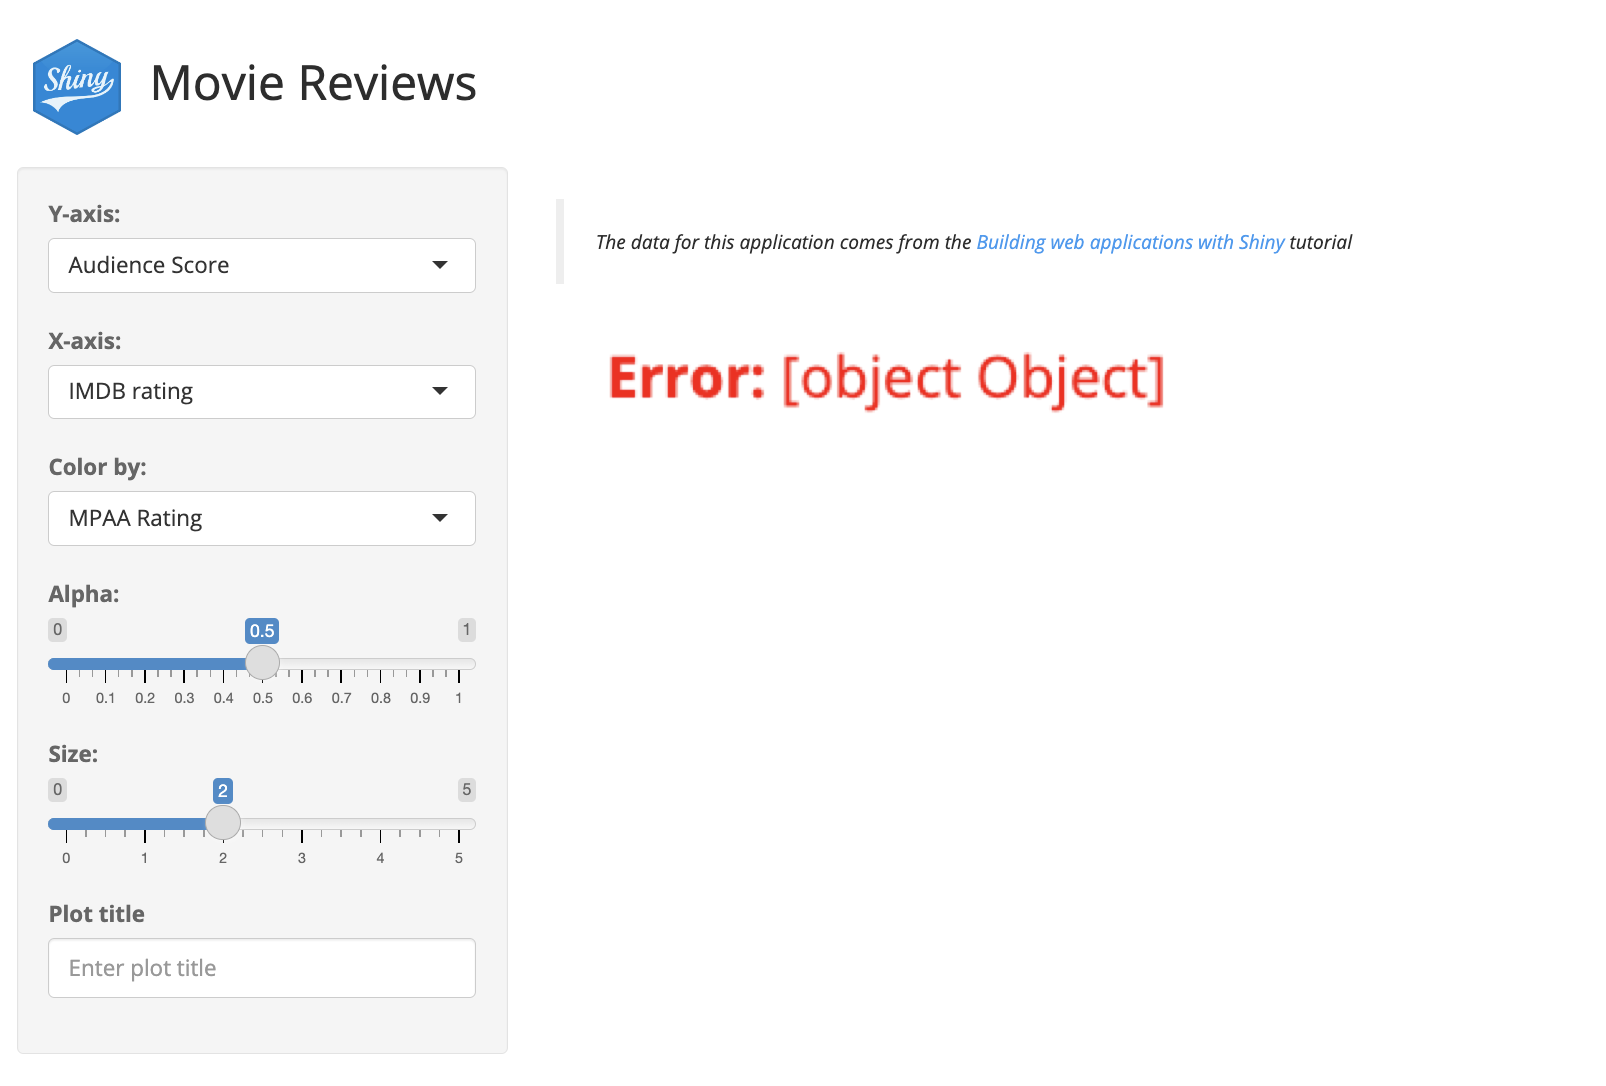
Debugging Shiny errors
Branch: 21.1_debug-error
Debugging errors in Shiny can be difficult
browser() and observe()
Branch: 21.2_debug-selected_vars
Wrapping browser() with observe() triggers the debugger when the observer is invalidated
Debugger: pause execution
Branch: 21.2_debug-selected_vars
The debugger pauses execution of the modules in movies_server()
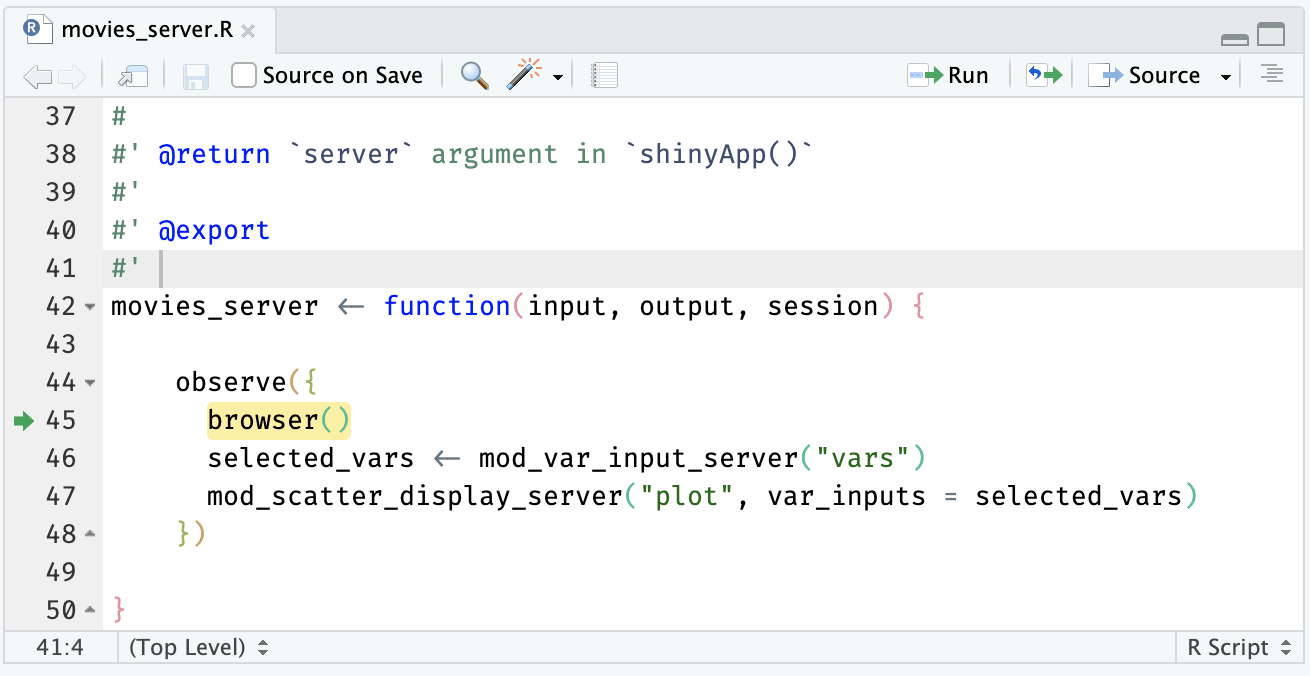
observe(browser())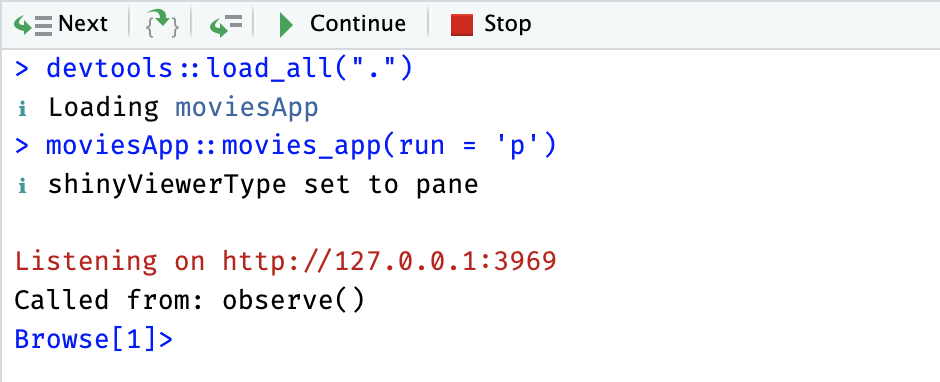
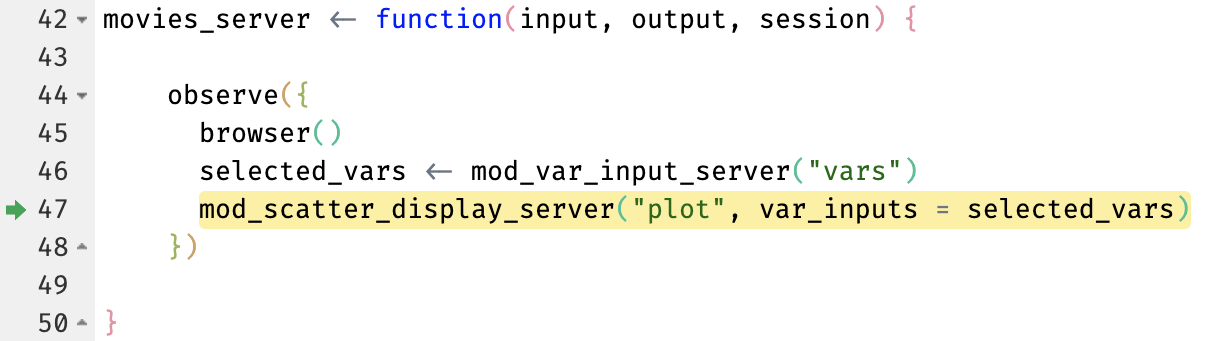
Debugger: execute line-by-line
Branch: 21.2_debug-selected_vars
Execute next line in the debugger by clicking ‘Next’ or by typing n and return/enter in Console.
Parentheses (or not)
Branch: 21.2_debug-selected_vars
selected_vars vs. selected_vars()
selected_vars without the parentheses returns the reactive() call (not the values)
Debugging modules
Branch: 21.3_debug-var_inputs
Repeat the process in mod_scatter_display_server()
Comparisons: waldo
Branch: 21.3_debug-var_inputs
Use waldo to compare var_inputs() and inputs()
Can you spot the error?
Comparisons: diffobj
Branch: 21.3_debug-var_inputs
Use diffobj to compare var_inputs() and inputs()

Press ENTER to continue...Can you spot the error?
Step into a function
Branch: 21.4_debug-scatter_plot
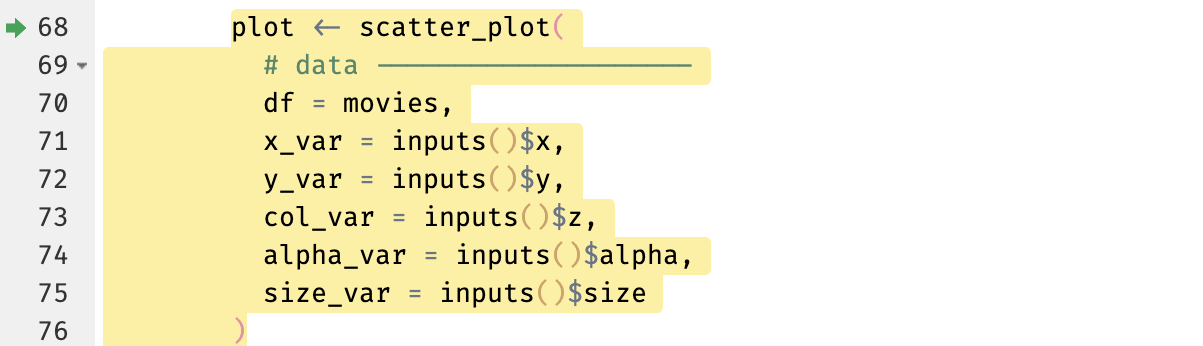
Step into scatter_plot() and print the plot (before the labels and theme layer are executed)
Well-placed print()s
Branch: 21.5_debug-print
The debugger is a powerful tool for your arsenal, but sometimes, a well-placed print() call is the best way to understand your application’s behavior.
In standard R functions, adding a distinctive print() statement in a function lets us quickly direct output to the Console.
In Shiny functions, we can capture the values in input with reactiveValuesToList() and print() them in the UI.
Shiny print() calls
Branch: 21.5_debug-print
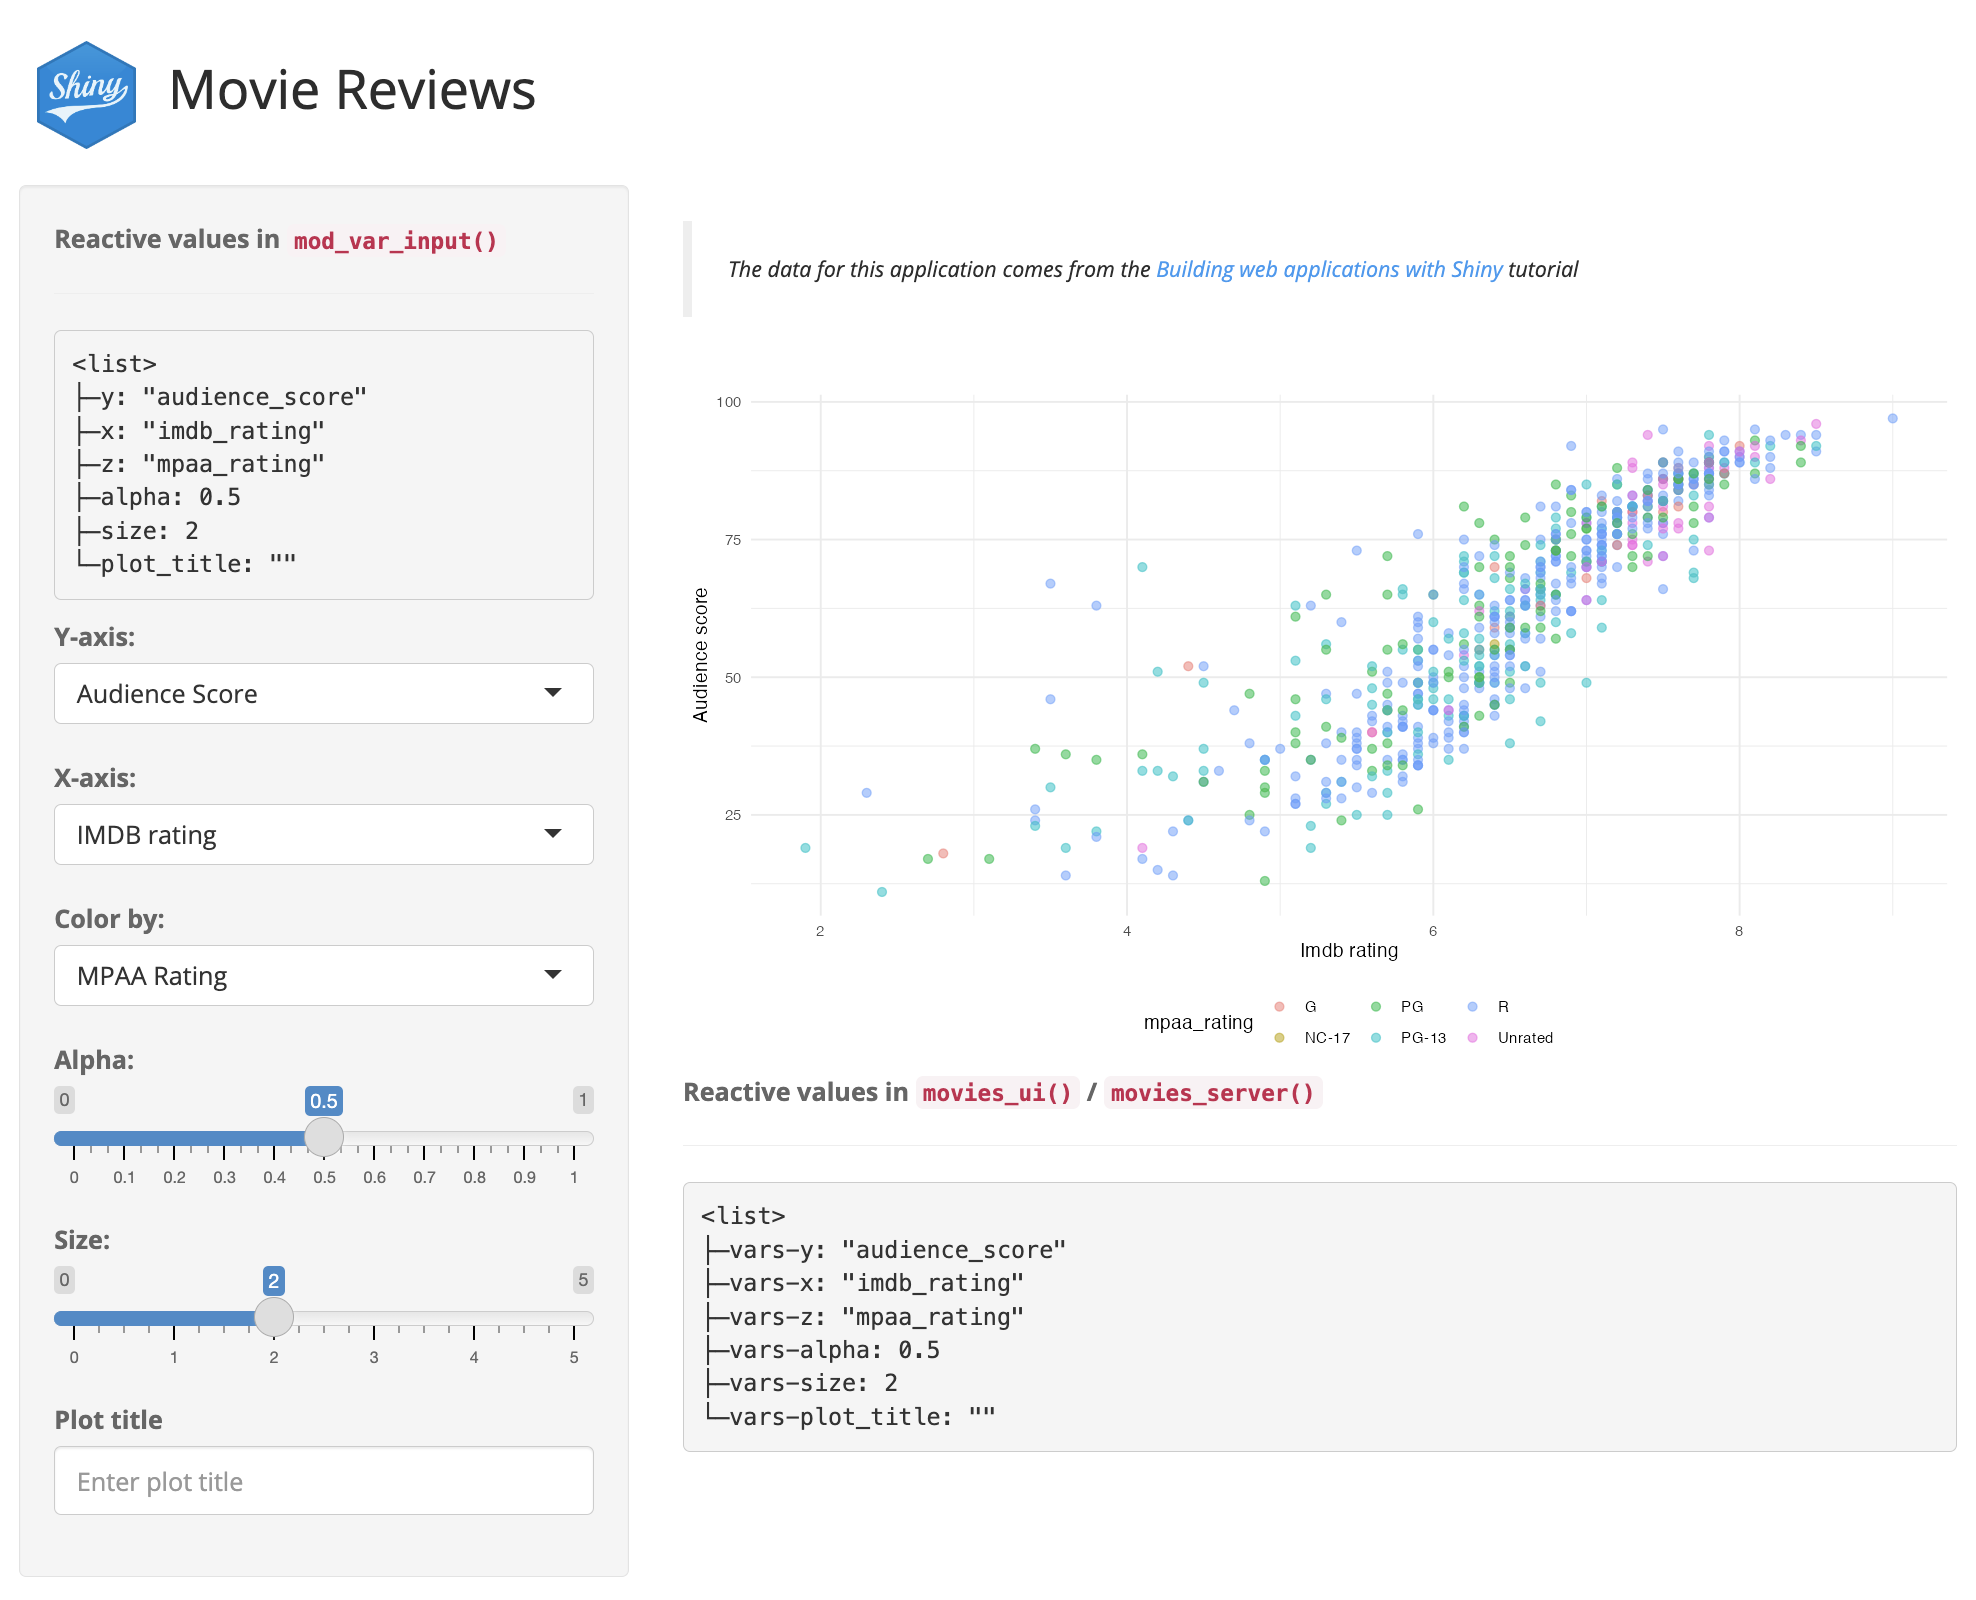
We can combine verbatimTextOutput(), renderPrint(), and reactiveValuesToList() to print the reactive values from modules and the UI/server functions:
Viewing print() calls in Shiny
Branch: 21.5_debug-print
The module’s reactive values are printed in the sidebar.
Viewing print() calls in Shiny
Branch: 21.5_debug-print
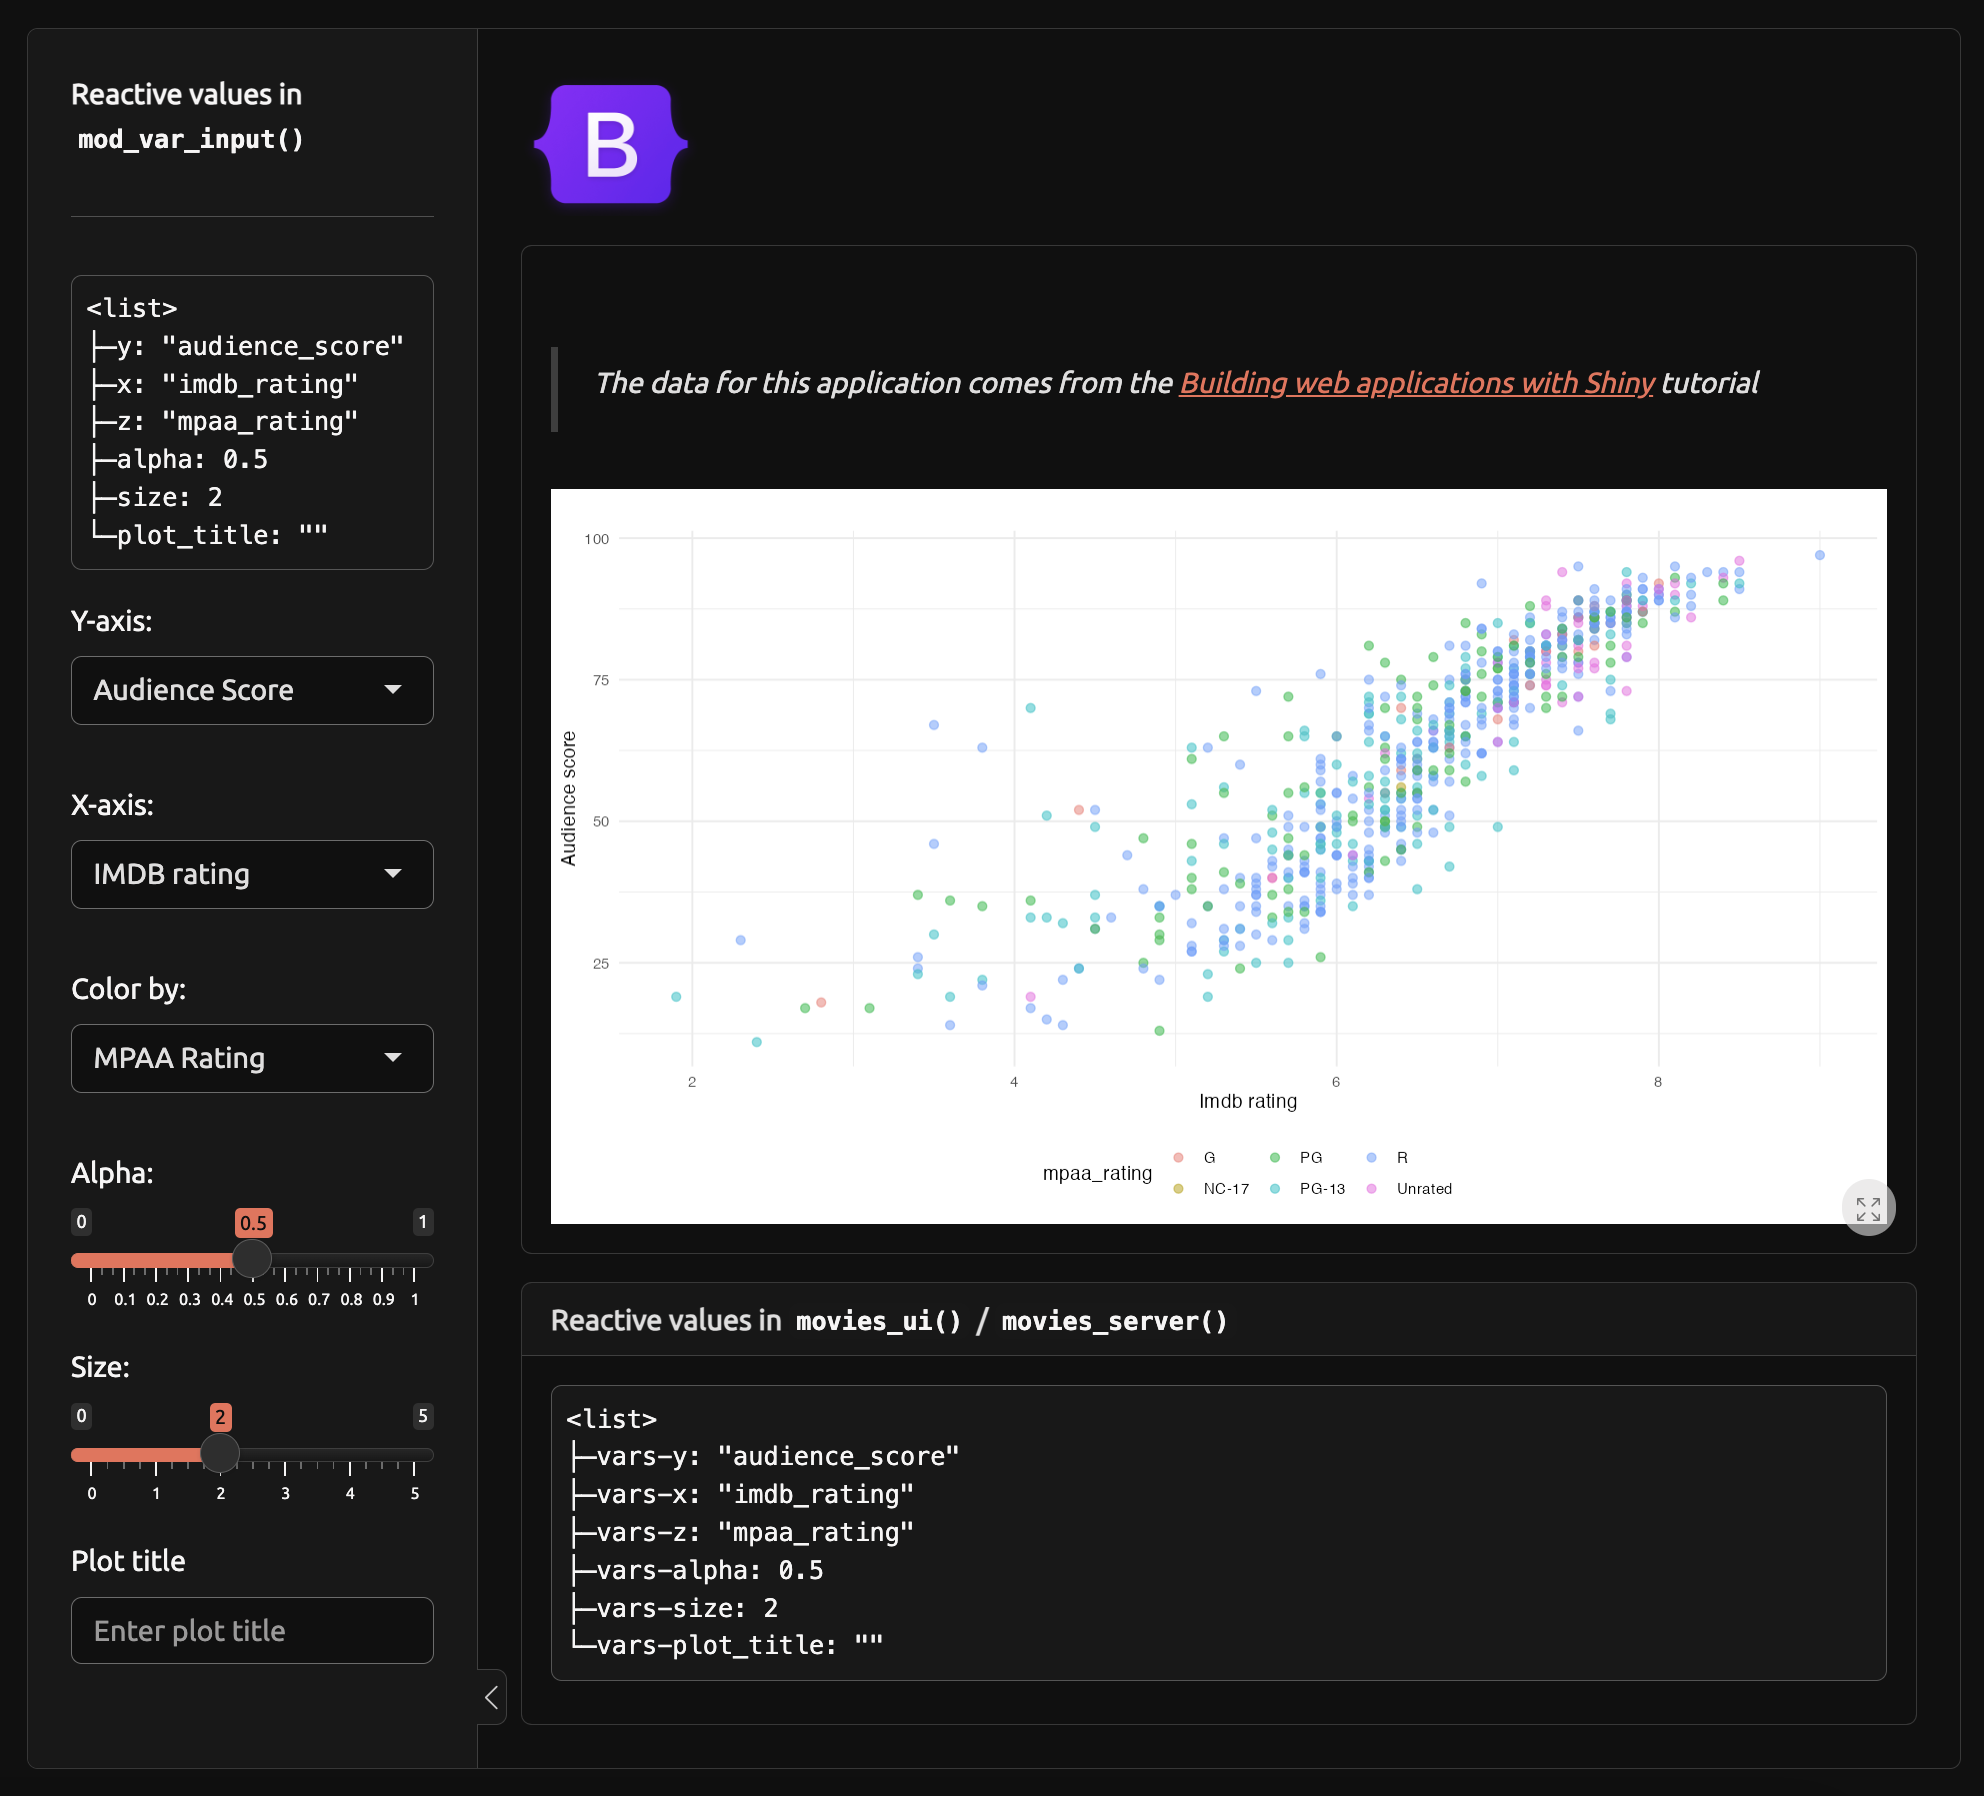
The reactive values for the app are printed in the main panel.
Snapshot tests
Branch: 23_tests-snapshots
The following slides give examples of snapshot tests with vdiffr.
Pros
Help identify visual regressions by comparing current output with previous snapshot
Ensure that plotting functions maintain consistent outputs throughout development
Cons
Brittle/sensitive to minor changes in color, spacing, labels, etc.
Can lead to test failures (even if the changes are insignificant)
Snapshot scenario
Branch: 23_tests-snapshots
An example Feature and Scenario for a snapshot tests:
testthat::describe("Feature: Scatter Plot Points Controlled by Dropdown Menus
As a user creating a scatter plot,
I want dropdown menus to select continuous variables for the x and y axes a
And I want a dropdown menu to select a categorical variable for point coloration,
So that I can effectively visualize the relationships and categories within the data.", code = {
testthat::it("Scenario: Change x, y, color values for plotting
When I launch the Scatter Plot Data Visualization
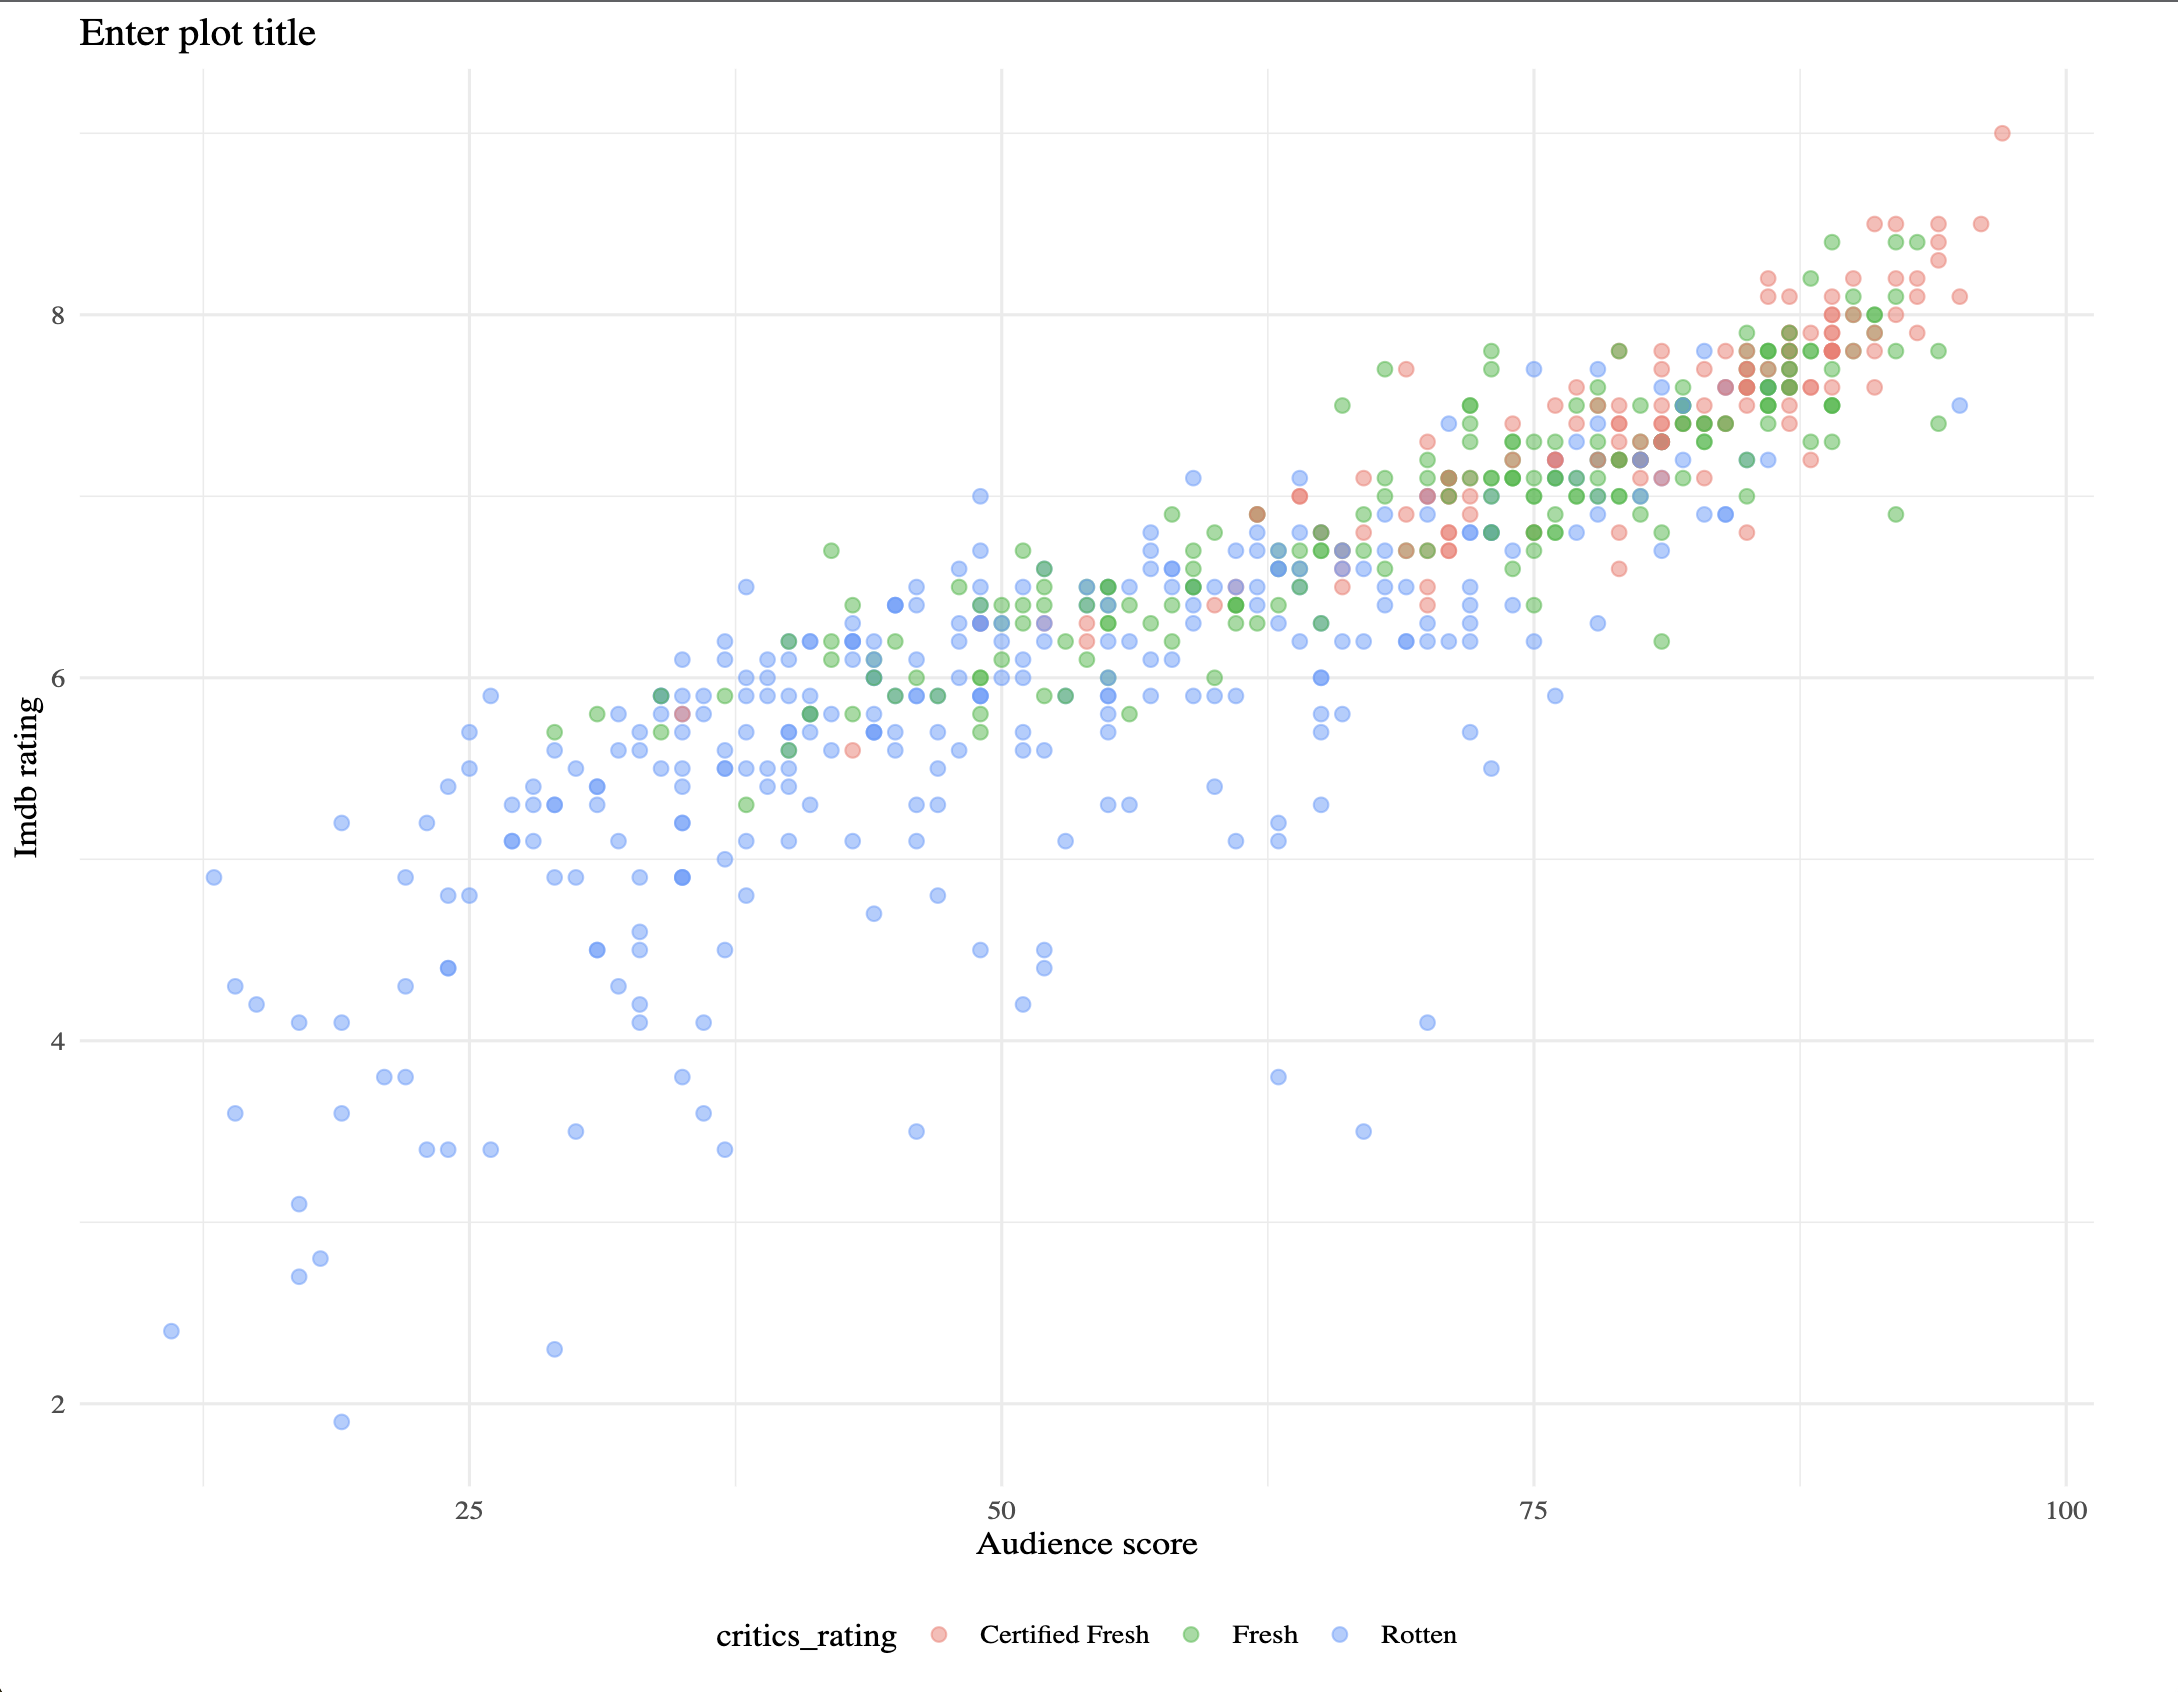
And I select the variable 'Audience Score' for the x-axis
And I select the variable 'IMDB Rating' for the y-axis
And I select the variable 'Critics Rating' for the color
Then the scatter plot should show 'Audience Score' on the x-axis
And the scatter plot should show 'IMDB Rating' on the y-axis
And the points on the scatter plot should be colored by 'Critics Rating'", code = {
})
})Visual unit test
Branch: 23_tests-snapshots
vdiffr allows us to perform a ‘visual unit test’
expect_doppelganger() stores the expected output as an .svg file
scatter_inputs <- list(x = 'imdb_rating',
                   y = 'audience_score',
                   z = 'mpaa_rating',
                   alpha = 0.5,
                   size = 2,
                   plot_title = 'Enter plot title')

vdiffr::expect_doppelganger(
  title = "Initial x y z axes",
  fig = scatter_plot(movies,
    x_var = scatter_inputs$x,
    y_var = scatter_inputs$y,
    col_var = scatter_inputs$z,
    alpha_var = scatter_inputs$alpha,
    size_var = scatter_inputs$size) +
Visual unit test
Branch: 23_tests-snapshots
The scenario describes a fully functional graph
So we include the labels and theme in the snapshot:
vdiffr::expect_doppelganger(
  title = "Initial x y z axes",
  fig = scatter_plot(movies,
    x_var = scatter_inputs$x,
    y_var = scatter_inputs$y,
    col_var = scatter_inputs$z,
    alpha_var = scatter_inputs$alpha,
    size_var = scatter_inputs$size) +
  ggplot2::labs(
    title = scatter_inputs$plot_title,
    x = stringr::str_replace_all(
        tools::toTitleCase(scatter_inputs$x),"_", " "),
    y = stringr::str_replace_all(
        tools::toTitleCase(scatter_inputs$y), "_", " ") ) +
  ggplot2::theme_minimal() +
  ggplot2::theme(legend.position = "bottom"))
Example test (snapshots & logging)
Branch: 23_tests-snapshots
The initial test run gives us a warning about the snapshot files
Snapshots
── Warning (test-scatter_plot.R:27:5):
Scenario: Displaying the Pre-configured Initial Scatter Plot ──
Adding new file snapshot: 'tests/testthat/_snaps/initial-x-y-z-axes.svg'

── Warning (test-scatter_plot.R:71:5):
Scenario: Change x, y, color values for plotting ──
Adding new file snapshot: 'tests/testthat/_snaps/updated-x-y-color.svg'
[ FAIL 0 | WARN 2 | SKIP 0 | PASS 2 ]Example test (snapshots & logging)
Branch: 23_tests-snapshots
Subsequent runs give more verbose output from devtools::test_active_file():
Reviewing snapshots
Branch: 23_tests-snapshots
initial-x-y-z-axes.svg
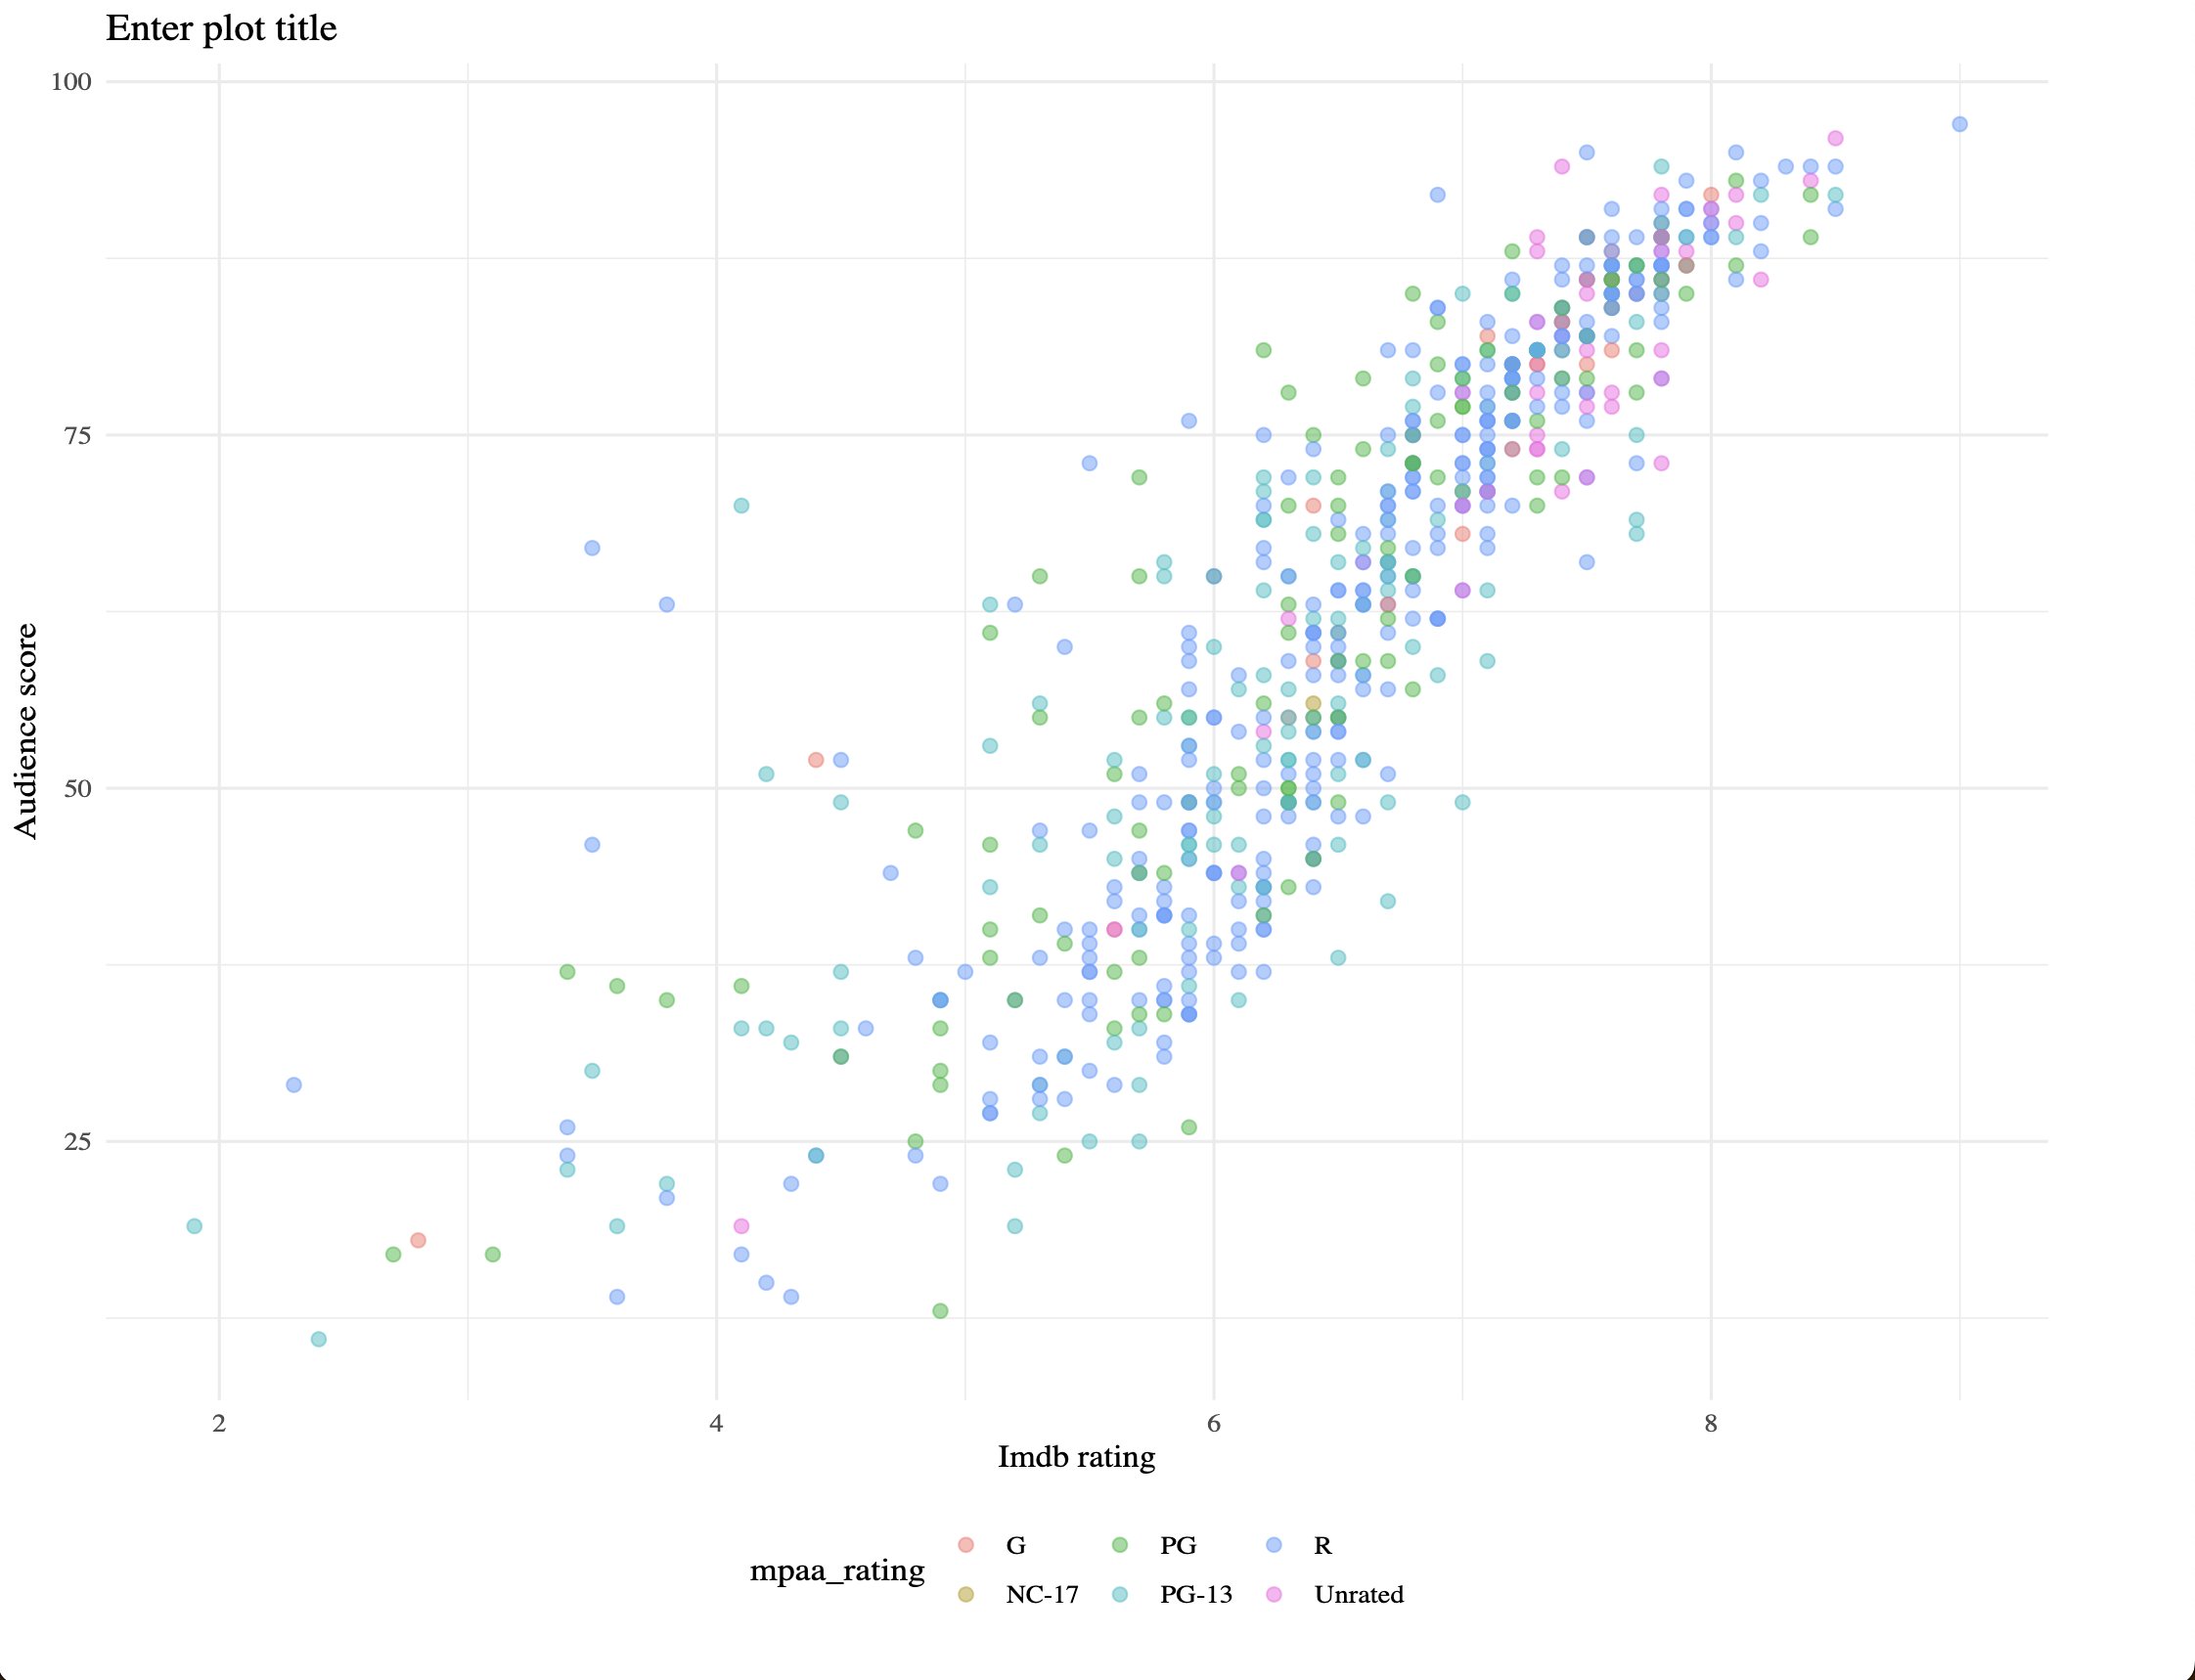
updated-x-y-color.svg
These are test results we can share with users/shareholders.
Test mocks
Branch: 24_tests-mocks
Test mocking functions are a relatively new addition to testthat
Example test with mocking
Branch: 24_tests-mocks
Mocking functions can be used to substitute functions by emulating their behavior within the test scope
Example function: check_installed()
Branch: 24_tests-mocks
Assume we have a check_installed() function that checks if a package is installed
The example above has been adapted from the package development masterclass workshop at posit::conf(2023)
Example function: feature and scenario
Branch: 24_tests-mocks
Feature and scenario decriptions for check_installed() might look like:
Example test mock
Branch: 24_tests-mocks
Instead of real-time computations, mocks return predefined responses to given inputs.
Notes on mocking
Branch: 24_tests-mocks
The roxygen2 documentation for check_installed() needs an @importFrom tag to import is_installed from rlang
Using explicit namespacing alone won’t work
#' Check if package is installed
#'
#' An example function for demonstrating how to use `testthat`'s
#' mocking functions.
#'
#' @param package string, name of package
#'
#' @return invisible
#'
#' @importFrom rlang is_installed
#'
#' @export
#'
#' @examples
#' check_installed("foo")
#' check_installed("base")