install.packages("R6")As a Shiny app-package grows, I’ve found it’s easy to end up with state scattered across reactives, observers, and module arguments. Shiny’s reactive model is naturally functional, but R6 classes let us bundle state, behavior, and business logic into a single object. In an app-package, {R6} offers clean separation of concerns, enforced namespace isolation, and business logic we can test outside the app.
But {R6} in Shiny can take different forms. In this post, we’ll compare two patterns:
{R6}for modules (stocktipr6): Wrap every module in anR6class with$ui()and$server()methods{R6}for Business Logic (movexplR6): Keep modules function-based; use{R6}for stateful business logic
We’ll explore what each pattern buys you, when to use each, and how they compare in practice.
What is {R6}?
{R6} is an object-oriented system in R that creates reference-based objects. Unlike S3 or S4, R6 objects are mutable and support encapsulation (i.e., public and private members). If you’ve written classes in Python or Java, R6 will feel familiar; methods belong to the object, and the object is modified in place (i.e., reference semantics).
To create R6 objects, install the {R6} package:
R6 objects are used throughout the R ecosystem:
plumber2uses{R6}to organize REST API routers and middleware; each route handler is a method bound to anR6object, making routing logic reusable and testableshinytest2uses{R6}for app testing objects; theAppDriverclass bundles together UI selectors, server interactions, and assertions, making test code fluent and maintainable
Shiny itself is built on {R6} (reactive values and observers are R6 classes under the hood), so using R6 objects in an app-package extends a pattern Shiny already relies on.
In Shiny app-packages, R6 objects are especially useful for:
- Bundling UI generation with business logic (i.e., making the module a unified object)
- Managing state tied to a user session or module instance
- Encapsulating dependencies and configuration
Two Approaches to {R6} in Shiny
To compare the two patterns, I’ve built two apps:
stocktipr6: A stock volatility dashboard where each module is anR6classmovexplR6: A movie database explorer where modules stay function-based, but business logic lives in{R6}
Let’s start with stocktipr6 (R6 modules) to see the architecture:
{R6} for Modules
Access the code here: mjfrigaard.github.io/stocktipr6
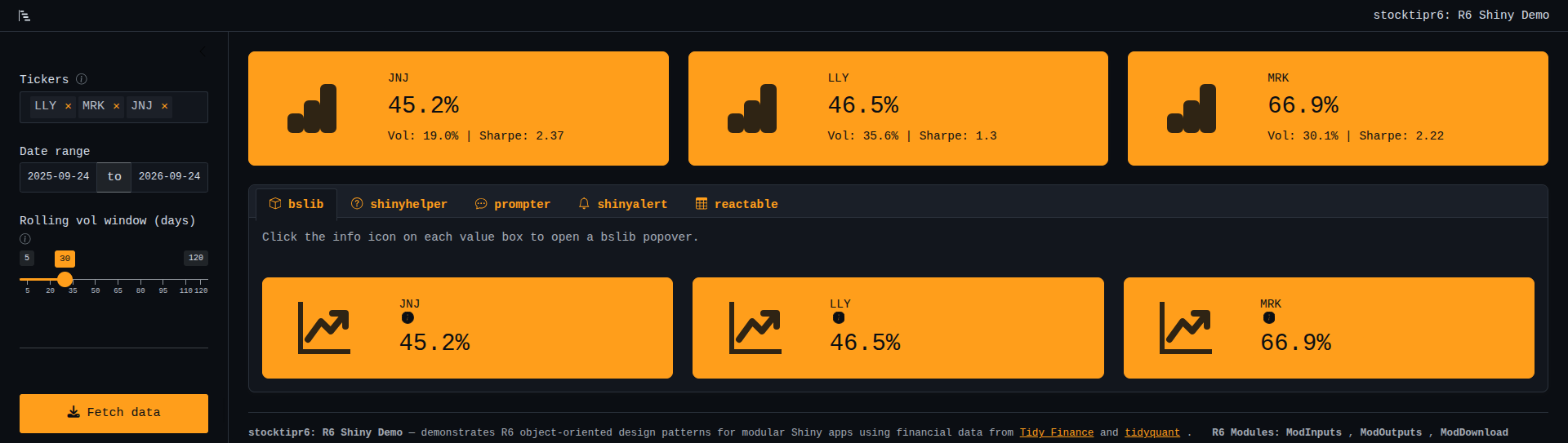
App structure
R/
├── app_server.R
├── app_ui.R
├── launch.R
├── ModDownload.R
├── ModInputs.R
├── ModOutputs.R
├── mod_hoverinfo.R
└── mod_tooltip.R- 1
-
Instantiates
R6module classes (ModInputs$new("inputs"),ModOutputs$new("outputs"),ModDownload$new("download")) and calls their$server()methods sequentially; passes reactive values downstream
- 2
-
Top-level UI function; calls
$ui()method on eachR6instance to compose the page
- 3
-
App entry point; calls
shinyApp(ui, server)
- 4
-
R6class bundling download UI and server logic; its$ui()card is placed in theModInputssidebar (equivalent tomod_download.Rinstocktipr)
- 5
-
R6class bundling inputs UI and server logic; returns reactive list from$server()method (equivalent tomod_inputs.Rinstocktipr)
- 6
-
R6class bundling outputs UI and server logic; consumes reactive inputs fromModInputs(equivalent tomod_outputs.Rinstocktipr)
- 7
-
Helper that wraps hover/tooltip text for
reactabletable cells (identical tostocktipr)
- 8
-
Tooltip icon helper component used in module labels (identical to
stocktipr)
Key difference from function-based modules: each module is a class. Instead of separate mod_inputs_ui.R and mod_inputs_server.R functions, there’s a single ModInputs.R file containing one R6 class with $ui() and $server() methods. This ensures the namespace ID is bound once at instantiation and shared by both methods.
{R6} for Business Logic
Access the code here: mjfrigaard.github.io/movexplR6
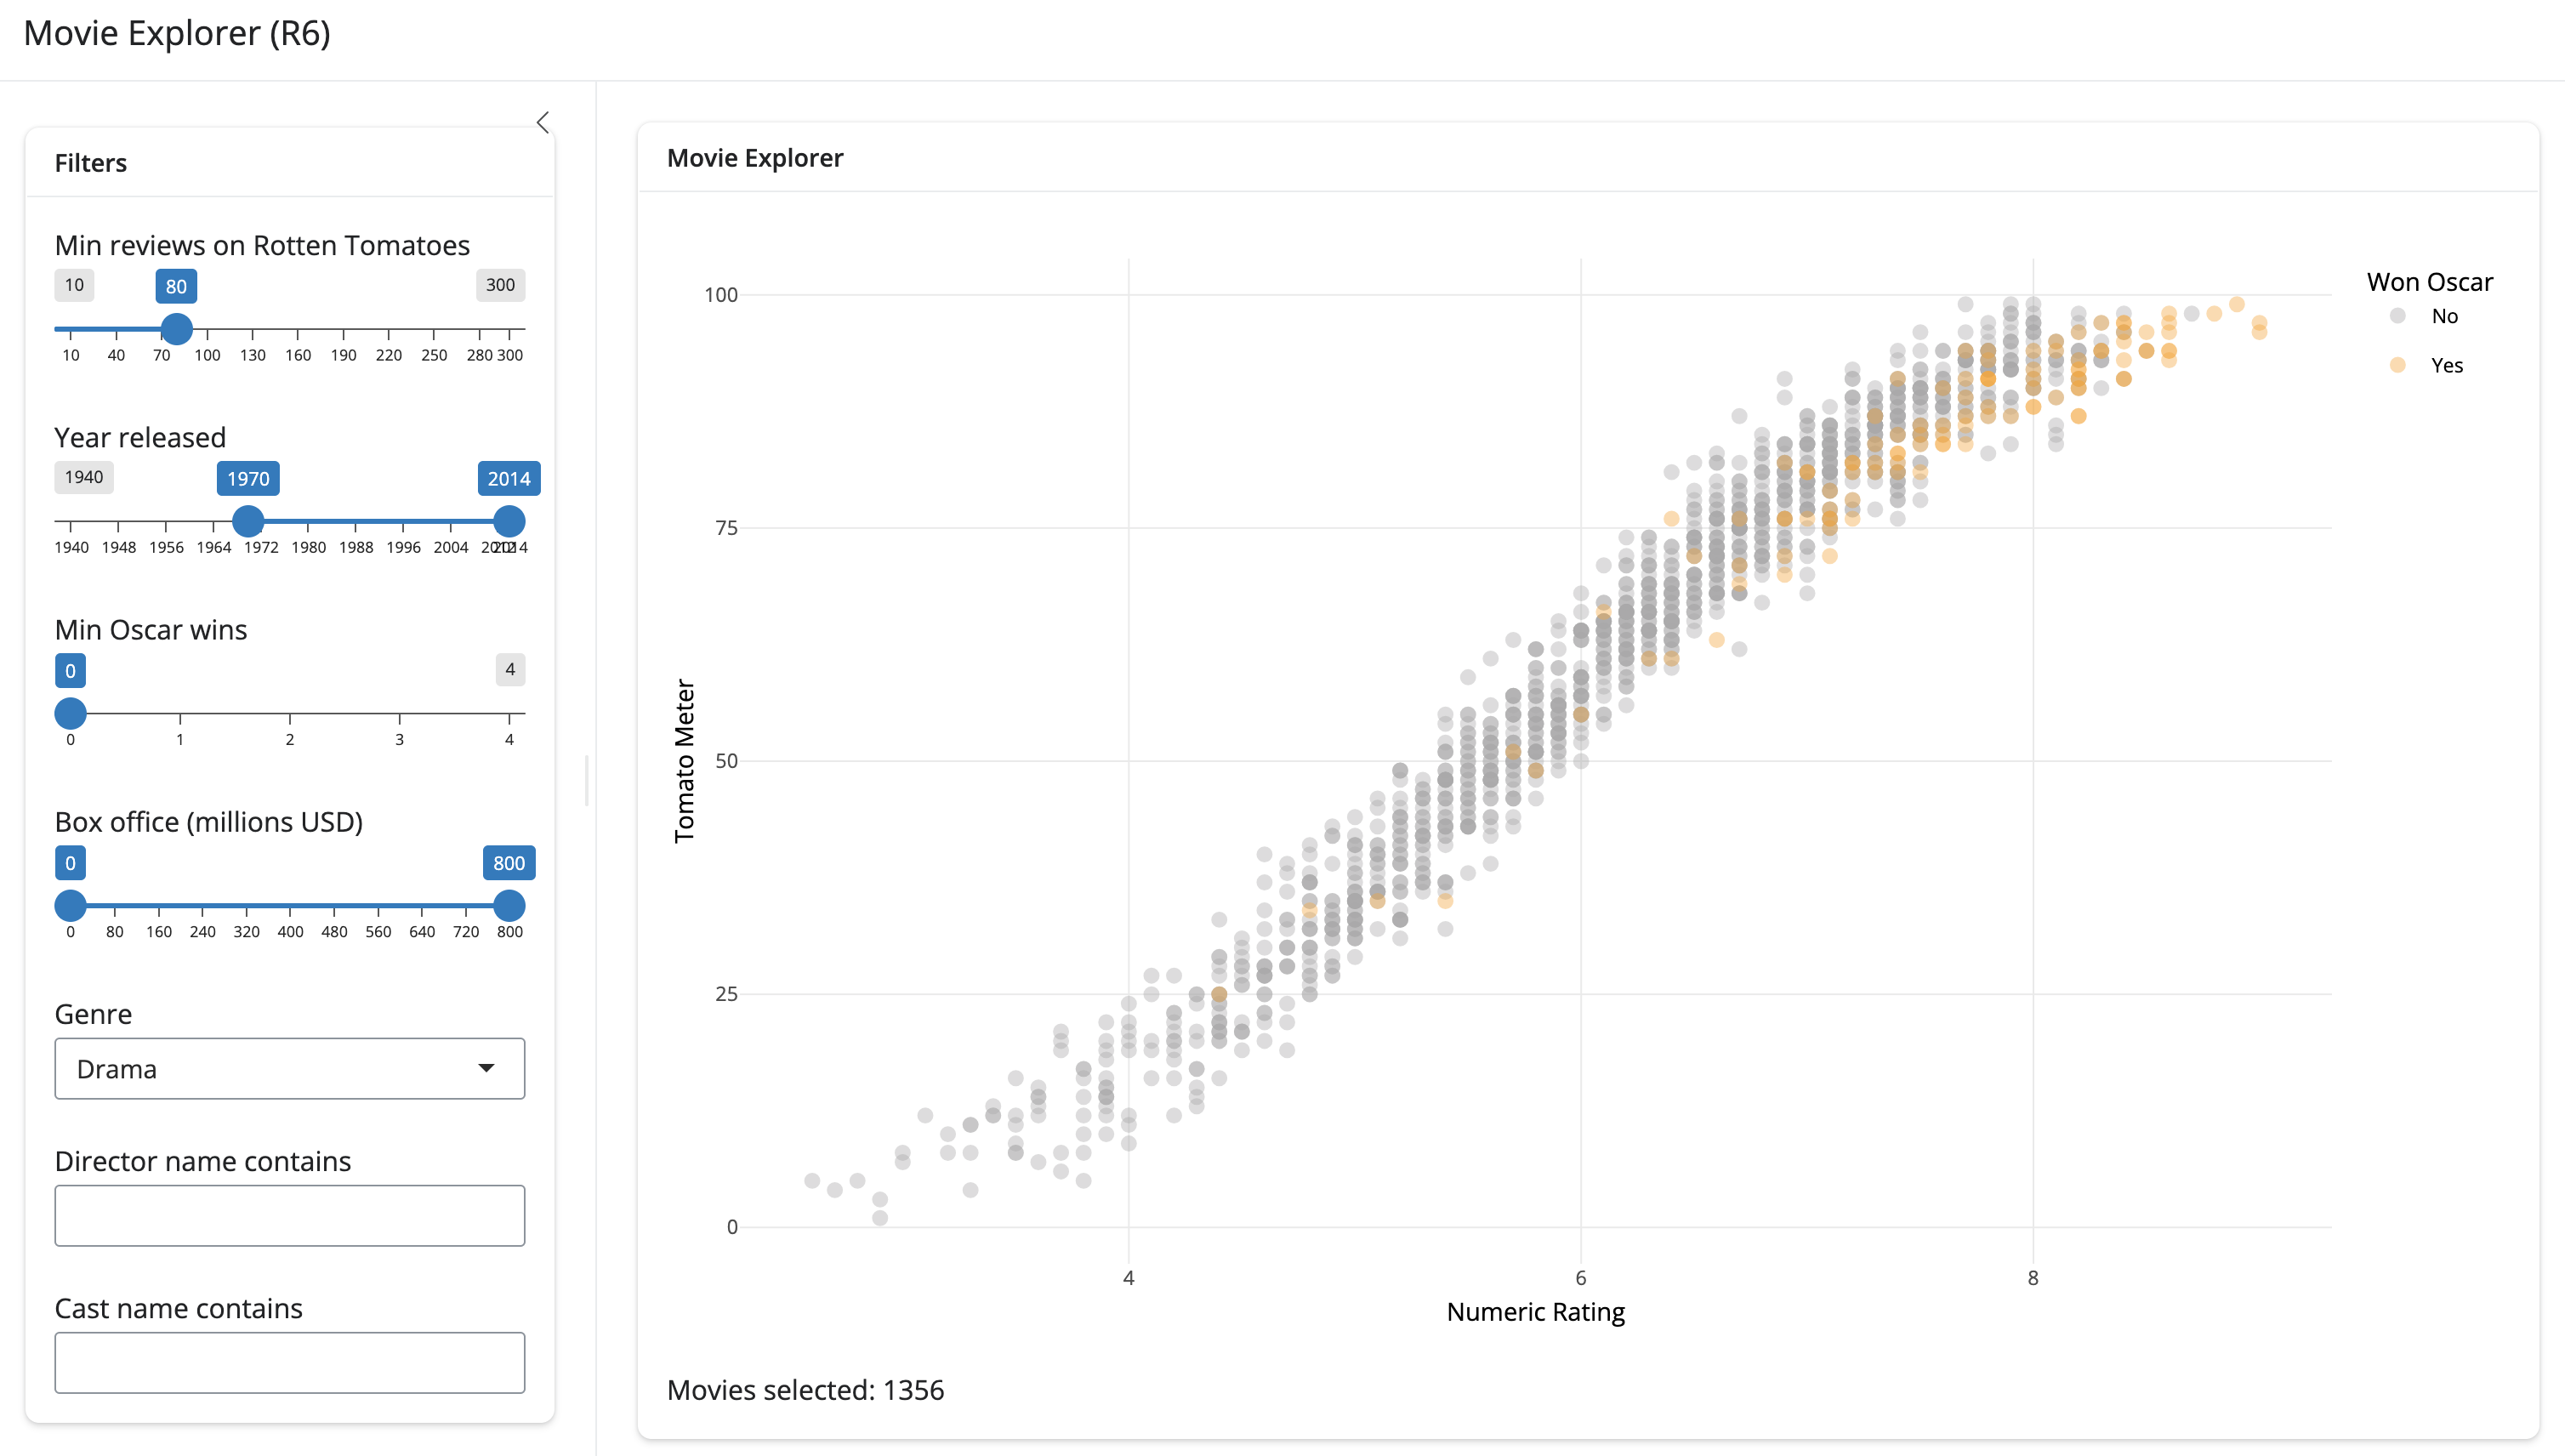
movexplR6 takes a different approach: it keeps Shiny modules function-based but uses {R6} for business logic and data management. Rather than wrapping each module in a class, it reserves {R6} for stateful, reusable concerns (database connections, data loading, filtering logic).
App structure
R/
├── launch_app.R
├── movies_server.R
├── movies_ui.R
├── MovieData.R
├── mod_filters.R
├── mod_plot.R
└── utils.R- 1
- App entry point; launches the Shiny app
- 2
-
Main server function; instantiates
MovieDataand wires modules together - 3
-
Top-level UI function; calls
mod_filters_ui()andmod_plot_ui() - 4
-
R6class managing SQLite database connection, data loading, and filtering logic - 5
- Function-based filter inputs module; returns reactive list of filter/axis selections
- 6
- Function-based plot display module; consumes reactive movies and filters
- 7
- Utility functions (theme, constants, helpers)
Key difference: Modules stay function-based (mod_filters.R, mod_plot.R each contain UI and server functions), but the data layer is encapsulated in an R6 class (MovieData). This separates UI/reactivity concerns from resource management.
Architectures
Both patterns work, but they solve different problems. stocktipr6 enforces architecture at the module level; movexplR6 enforces it at the business logic layer. The choice depends on where your app’s complexity lives.
R6 Modules
In stocktipr6, each module is an R6 class. When writing R6 modules, both the UI and server logic are wrapped into a single class. Below is a simplified example from stocktipr6 (view the full version on GitHub.).
hide/show ModInputs
ModInputs <- R6::R6Class(
"ModInputs",
public = list(
initialize = function(id = "inputs") {
private$id <- id
private$ns <- shiny::NS(id)
},
ui = function() {
bslib::sidebar(
width = 280,
bg = "#f8f9fa",
shiny::selectizeInput(
inputId = private$ns("tickers"),
label = shiny::tags$span(
"Tickers",
mod_tooltip(
trigger = bsicons::bs_icon("info-circle"),
type = "bslib",
contents = "Enter one or more stock ticker symbols (e.g. AAPL, MSFT).",
size = "0.85rem",
style = "color:#6c757d"
)
),
choices = default_tickers,
selected = c("AAPL", "MSFT", "GOOGL"),
multiple = TRUE,
options = list(
plugins = list("remove_button"),
placeholder = "Add a ticker\u2026",
create = TRUE
)
),
shiny::dateRangeInput(
inputId = private$ns("dates"),
label = "Date range",
start = Sys.Date() - 365,
end = Sys.Date(),
min = "2000-01-01",
max = Sys.Date()
),
shiny::sliderInput(
inputId = private$ns("vol_window"),
label = shiny::tags$span(
"Rolling vol window (days)",
mod_tooltip(
trigger = bsicons::bs_icon("info-circle"),
type = "bslib",
contents = "Number of trading days used for the rolling volatility calculation.",
size = "0.85rem",
style = "color:#6c757d"
)
),
min = 5L,
max = 120L,
value = 30L,
step = 5L
),
shiny::actionButton(
inputId = private$ns("fetch"),
label = "Fetch data",
icon = shiny::icon("download"),
class = "btn-primary w-100"
),
bslib::card(
bslib::card_header(
bsicons::bs_icon("file-earmark-arrow-down"), " Download Report"
),
bslib::card_body(
shiny::selectInput(
inputId = private$ns("format"),
label = "Report format",
choices = c("HTML" = "html", "PDF" = "pdf"),
selected = "html"
),
shiny::downloadButton(
outputId = private$ns("download"),
label = "Download",
icon = shiny::icon("download"),
class = "btn-outline-primary w-100"
)
)
)
)
},
server = function() {
shiny::moduleServer(private$id, function(input, output, session) {
shiny::observe({
shiny::req(input$fetch)
if (length(input$tickers) == 0) {
shiny::showNotification(
"Please select at least one ticker.",
type = "warning"
)
}
})
shiny::reactive({
with_logging(
context = "ModInputs / reactive list",
ns = "stocktipr6/inputs",
{
inp <- list(
tickers = input$tickers,
from = input$dates[1],
to = input$dates[2],
vol_window = input$vol_window,
fetch = input$fetch,
format = input$format
)
inp
}
)
})
})
}
),
private = list(
id = NULL,
ns = NULL
)
)- 1
-
initialize()stores the module’s namespace ID and creates a namespace function - 2
-
ui()is a public method that builds UI tags; it usesprivate$ns()to namespace inputs
- 3
- Stock ticker picker
- 4
-
Date range input
- 5
-
Rolling-vol window
- 6
- Fetch stock data
- 7
- Report download (placeholder)
- 8
-
server()wraps the module server logic and returns a reactive expression - 9
-
Fetch button observer
- 10
-
Reactive inputs list
- 11
-
privatemembers hold internal state; can’t be accessed from outside the object
Before going further, it’s worth comparing how R6 modules and function-based modules handle the namespace id.
R6 Modules vs. standard functions
stocktipr6 bundles both UI and server into a single R6 class. ModInputs$new("inputs") creates one instance where the id is stored in private$id and automatically available to both the ui() and server() methods.
%%{init: {'theme': 'base', 'themeVariables': { 'fontFamily': 'monospace', "darkMode":true}}}}%%
flowchart TD
subgraph R6Based["<strong>R6 Class</strong>"]
New["<strong>ModInputs$new('inputs')</strong>"]
Instance["Single instance<br/>owns <code>id</code> & <code>ns</code>"]
UiM["<strong>$ui()</strong>"]
ServM["<strong>$server()</strong>"]
end
New -->|"binds <code>id</code>"| Instance
Instance -->|"uses <code>id</code>"| UiM
Instance -->|"uses <code>id</code>"| ServM
style New fill:#4CBB9D,color:#FFFFFF,rx:5,ry:5,font-family:monospace
style Instance fill:#E0F0ED,color:#000000,stroke:#4CBB9D
style UiM fill:#4CBB9D,color:#FFFFFF,rx:5,ry:5,font-family:monospace
style ServM fill:#4CBB9D,color:#FFFFFF,rx:5,ry:5,font-family:monospace
The id is bound at instantiation and encapsulated in the object. Both $ui() and $server() methods access it from the same source, so within an instance, the UI and server namespaces can’t drift out of sync.
In function-based modules, both UI and server functions must receive the same id argument to share a namespace.
%%{init: {'theme': 'base', 'themeVariables': { 'fontFamily': 'monospace', "darkMode":true}}}}%%
flowchart TD
subgraph FuncBased["<strong>Function-Based</strong>"]
direction LR
UICall("mod_inputs_ui('inputs')")
ServerCall("mod_inputs_server('inputs')")
Separate(("<em>Two separate<br/>function calls<br/>same ID by convention</em>"))
end
style UICall fill:#FFF8E7,color:#000000,stroke:#999,font-family:monospace
style ServerCall fill:#FFF8E7,color:#000000,stroke:#999,font-family:monospace
style Separate fill:#FFE0E0,color:#000000,stroke:#c0392b
The responsibility for keeping them in sync falls on the developer.
{R6} for Business Logic
movexplR6 shows a different pattern; it uses {R6} for resources and business logic and keeps the Shiny modules function-based. This cleanly separates concerns: stateful data access in {R6}, stateless UI/reactivity in functions.
The MovieData class in movexplR6 manages a SQLite connection and filtering logic:
hide/show MovieData class
MovieData <- R6::R6Class(
"MovieData",
public = list(
con = NULL,
all_movies = NULL,
initialize = function(db_path) {
self$con <- DBI::dbConnect(RSQLite::SQLite(), db_path)
self$all_movies <- private$load_data()
},
filter = function(reviews = 10, oscars = 0, year = c(1940, 2014),
boxoffice = c(0, 800), genre = "All",
director = "", cast = "") {
self$all_movies |>
dplyr::filter(Reviews >= reviews, Oscars >= oscars)
},
disconnect = function() {
DBI::dbDisconnect(self$con)
}
),
private = list(
load_data = function() { # joins and collects query results
}
)
)- 1
- Open connection and load data on initialization
- 2
-
Public
$filter()method; no UI concern here, just business logic - 3
-
Explicit
$disconnect()method for cleanup
Meanwhile, the UI modules stay function-based and lightweight. In movies_server(), you instantiate the R6 object once and wire it into the reactive pipeline:
movies_server <- function(input, output, session) {
movie_data <- MovieData$new("movies.db")
shiny::onStop(function() movie_data$disconnect())
filters <- mod_filters_server("filters")
movies <- shiny::reactive({
movie_data$filter(
reviews = filters()$reviews,
oscars = filters()$oscars,
# ... other filter params
)
})
mod_plot_server("plot", movies, filters)
}This hybrid approach works well when your app has complex data operations, external connections, or shared state that doesn’t fit naturally into Shiny’s reactive model. You keep the UI/server modules lightweight and function-based while {R6} handles the heavy lifting.
Comparison: stocktipr6 vs movexplR6
Both apps need to manage state, but they organize it differently.
Public and Private Members
In {R6}, public methods are callable from outside the object; private members are internal. With full R6 modules (stocktipr6):
- Public methods (
$ui(),$server()) build the interface and run reactive logic - Private members (
private$id,private$ns) store namespace information that both methods share
This sharing is the key benefit: the id is set once at instantiation and automatically available to both methods.
Initialization:
initialize = function(id = "inputs") {
private$id <- id
private$ns <- NS(id)
}UI method:
ui = function() {
sidebar(
selectizeInput(
inputId = private$ns("tickers"), # <-- uses private namespace
label = "Tickers",
# ...
),
# ... more inputs
)
}Server method:
server = function() {
moduleServer(private$id, function(input, output, session) { # <-- same ID
reactive({
list(
tickers = input$tickers,
from = input$dates[1],
to = input$dates[2],
vol_window = input$vol_window
)
})
})
}The id and ns are shared across methods, so they’re always in sync.
Lifecycle
The lifecycle flows like this:
ModInputs$new(id = "inputs")runsinitialize(), binding the IDModInputs$ui()is called inapp_ui(), usingprivate$ns()for namespacingModInputs$server()is called inapp_server(), usingprivate$idfor module scope
Both methods share the same private state.
%%{init: {'theme': 'base', 'themeVariables': { 'fontFamily': 'monospace', "darkMode":true}}}}%%
flowchart LR
subgraph "<strong>R6 Module Lifecycle</strong>"
Init["<strong>ModInputs$new(id)</strong><br><em>Runs initialize()</em>"]
Id("<strong>private$id</strong>")
Ns("<strong>private$ns()</strong>")
UI["<strong>$ui()</strong><br/><em>Called in<br>app_ui()</em>"]
Server["<strong>$server()</strong><br><em>Called in app_server()</em>"]
end
Init -->|"stores"| Id
Init -->|"creates"| Ns
UI -->|"uses"| Ns
Server -->|"uses"| Id
style Init fill:#4CBB9D,color:#FFFFFF,rx:5,ry:5,font-family:monospace
style Id fill:#FFFFFF,color:#000000,stroke:#333,font-family:monospace
style Ns fill:#FFFFFF,color:#000000,stroke:#333,font-family:monospace
style UI fill:#4CBB9D,color:#FFFFFF,rx:5,ry:5,font-family:monospace
style Server fill:#4CBB9D,color:#FFFFFF,rx:5,ry:5,font-family:monospace
Private Members
The private list holds internal state (id and ns). These are accessed by public methods, but they aren’t part of the public interface (tests can still reach them through .__enclos_env__, as shown below).
%%{init: {'theme': 'base', 'themeVariables': { 'fontFamily': 'monospace', "darkMode":true}}}}%%
flowchart TD
subgraph "<strong>Namespace Isolation</strong>"
Ns(["<strong>ns()</strong>"])
IDs("input/output IDs")
Prefix("Prefixed IDs<br><code>ns-input</code>")
end
Ns -->|prefixes| IDs
IDs -->|creates| Prefix
Prefix -->|prevents| Conflicts(["<em>ID conflicts<br>across modules</em>"])
style Ns fill:#4CBB9D,color:#FFFFFF,rx:5,ry:5,font-family:monospace,text-align:'center'
style IDs fill:#FFFFFF,color:#000000,stroke:#333
style Prefix fill:#FFFFFF,color:#000000,stroke:#333
style Conflicts fill:#FFE0E0,color:#000000,stroke:#c0392b
State Management: Two Approaches
State ownership differs between the two patterns.
Full R6 Modules (stocktipr6)
In stocktipr6, each module is an instance with its own private state. When ModOutputs needs data from ModInputs, it receives the reactive list returned by ModInputs$server() and consumes it as a parameter.
%%{init: {'theme': 'base', 'themeVariables': { 'fontFamily': 'monospace', "darkMode":true}}}}%%
flowchart TD
subgraph R6Flow["<strong>R6 Module Flow</strong>"]
MI["<strong>ModInputs$new()</strong>"]
MS["<strong>ModInputs$server()</strong>"]
MReact[/"reactive list"/]
MPass["<strong>ModOutputs$server()</strong>"]
MOwn(["<em>State: owned by<br/>module instance</em>"])
end
MI -->|"creates instance"| MS
MS -->|"returns"| MReact
MReact -->|"consumed by"| MPass
MPass --> MOwn
style MI fill:#4CBB9D,color:#FFFFFF,rx:5,ry:5,font-family:monospace
style MS fill:#4CBB9D,color:#FFFFFF,rx:5,ry:5,font-family:monospace
style MPass fill:#4CBB9D,color:#FFFFFF,rx:5,ry:5,font-family:monospace
style MOwn fill:#E0F0ED,color:#000000,stroke:#4CBB9D
Dependencies flow in one direction: downstream modules receive what they need from upstream instances, and can’t modify the upstream module’s private state. This one-way flow means a downstream module can’t accidentally overwrite an upstream module’s inputs.
{R6} for Business Logic (movexplR6)
In movexplR6, the R6 layer manages resources and data, while function-based modules handle the UI/reactivity. We covered the architecture earlier; now let’s see what happens when we inspect the state at runtime and compare it across both patterns.
Debugging and Inspection
When something breaks, the first thing I want to know is what state a module is holding. Each pattern answers that question differently.
R6 Objects (stocktipr6)
The full R6 approach lets us inspect the module object directly at runtime:
# in R/app_server.R
inputs <- ModInputs$new(id = "inputs")
inputs_r <- inputs$server()
# Inspect the object
str(inputs) # Shows the R6 class structureOutput:
Classes 'ModInputs', 'R6' <ModInputs>
Public:
clone: function (deep = FALSE)
initialize: function (id = "inputs")
server: function ()
ui: function ()
Private:
id: inputs
ns: function (id)This tells us immediately that the module owns an id (bound at instantiation), a namespace function, and public methods for UI and server. Everything is encapsulated in one object.
Function-Based Modules (movexplR6)
In movexplR6, modules stay function-based, so there’s no object to inspect. But the R6 data layer (MovieData) is directly inspectable:
# in R/movies_server.R
movie_data <- MovieData$new("movies.db")
# Inspect the object
str(movie_data) # Shows the R6 class structureOutput:
Classes 'MovieData', 'R6' <MovieData>
Public:
all_movies: data.frame (1000 obs, 15 vars)
clone: function (deep = FALSE)
con: SQLiteConnection
disconnect: function ()
filter: function (reviews = 10, oscars = 0, ...)
initialize: function (db_path)
Private:
load_data: function ()This tells us the data layer’s state (the con connection and the all_movies data frame), methods, and lifecycle. The modules themselves remain lightweight.
Why Encapsulation Matters
The R6 approach (whether full modules or business logic layer) makes state ownership explicit. With full R6 modules (stocktipr6):
- The module’s identity and dependencies are clear:
inputs$server()uses the same ID asinputs$ui() - The UI and server namespaces can’t drift apart; the ID is bound at instantiation
With the hybrid approach (movexplR6):
- Business logic is centralized in one object that manages resources
- Modules remain simple and stateless
- The connection lifecycle and data access are clear and testable
Without encapsulation (pure function-based), a typo like passing "input" instead of "inputs" to mod_inputs_server() creates a silent namespace mismatch. The app still launches, but the inputs never reach the server.
Business Logic vs UI Encapsulation
The key difference between the two patterns:
- stocktipr6 (full
R6modules): Encapsulates UI/server logic. Each module is a self-contained unit. - movexplR6 (hybrid): Encapsulates business logic. Modules stay simple; complexity lives in the data layer.
In movexplR6, the data layer owns the connection lifecycle:
movies_server <- function(input, output, session) {
# Initialize R6 data layer
movie_data <- MovieData$new("movies.db")
shiny::onStop(function() movie_data$disconnect())
# Use function-based modules
filters <- mod_filters_server("filters")
# Wire R6 to reactive pipeline
movies <- shiny::reactive({
movie_data$filter(
reviews = filters()$reviews,
oscars = filters()$oscars
)
})
mod_plot_server("plot", movies, filters)
}- 1
- Initialize the data layer once per session
- 2
- Register cleanup on session end
- 3
-
Call
R6methods from reactive expressions
The R6 object ensures the database connection opens on initialization and closes when the session ends. Function-based modules stay lightweight; they don’t need to know about connection management. They just consume filtered data from the reactive expression.
%%{init: {'theme': 'base', 'themeVariables': { 'fontFamily': 'monospace', "darkMode":true}}}}%%
flowchart TD
subgraph R6Layer["<strong>R6 Data Layer</strong>"]
New["<strong>MovieData$new()</strong>"]
Filter["<strong>$filter()</strong>"]
Con[("Database")]
end
subgraph FuncLayer["<strong>Function Modules</strong>"]
ModFilters["<strong>mod_filters_server()</strong>"]
ModPlot["<strong>mod_plot_server()</strong>"]
end
New -->|"opens"| Con
ModFilters -->|"returns params"| Filter
Filter -->|"queries"| Con
Filter -->|"returns"| ModPlot
style New fill:#4CBB9D,color:#FFFFFF,rx:5,ry:5,font-family:monospace
style Filter fill:#4CBB9D,color:#FFFFFF,rx:5,ry:5,font-family:monospace
style Con fill:#B3CDE0,color:#000000,stroke:#333,font-family:monospace
style ModFilters fill:#FFF8E7,color:#000000,stroke:#999,font-family:monospace
style ModPlot fill:#FFF8E7,color:#000000,stroke:#999,font-family:monospace
Trade-offs: stocktipr6 vs movexplR6
Both patterns solve encapsulation problems, but they apply {R6} at different layers.
| Aspect | stocktipr6 (Full {R6}) |
movexplR6 (Hybrid) |
|---|---|---|
| Module structure | Each module is an R6 class (ModInputs, ModOutputs, etc.) |
Modules stay function-based (mod_filters, mod_plot) |
| Where state lives | Private members in each R6 instance (private$id, private$ns) |
R6 class manages data/resources (MovieData$all_movies, MovieData$con) |
| Complexity per module | Higher (must define initialize(), ui(), server()) |
Lower (just mod_*_ui() and mod_*_server() functions) |
| Namespace safety | Guaranteed; ID is bound at instantiation | Developer’s responsibility; functions must receive same ID |
| Resource lifecycle | Each module owns its own data | Central R6 object owns resources; modules consume them |
| When to use | Apps with complex module interdependencies; multi-developer projects | Apps with clear UI/data separation; heavy resource management needs |
| Testing | Modules are self-contained objects; easier to unit test | R6 layer is testable; modules tested via integration tests |
| Code reuse | Modules can be exported and reused as package API | Business logic ({R6}) is reusable; UI modules are app-specific |
Both patterns are valid. The choice depends on where your complexity lives:
- Choose stocktipr6 pattern if:
- You have many interdependent modules
- You want to reuse modules across apps (export them as a package)
- Your team is large or you want to enforce architectural constraints
- Namespace safety is critical
- Choose movexplR6 pattern if:
- Your app has a clear data layer (database, API, cache)
- Modules are mostly independent and simple
- You want lightweight, straightforward code for UI/reactivity
- Business logic is complex but UI is simple
Using R6 Modules (stocktipr6)
In the app’s UI, instantiate the R6 objects and call their $ui() methods. The server creates its own instances with the same id values, so both sides share the same namespace:
app_ui <- function() {
inputs <- ModInputs$new(id = "inputs")
outputs <- ModOutputs$new(id = "outputs")
download <- ModDownload$new(id = "download")
bslib::page_sidebar(
sidebar = inputs$ui(download$ui()),
outputs$ui()
)
}In the app’s server, instantiate R6 objects and wire their $server() methods together:
app_server <- function(input, output, session) {
inputs <- ModInputs$new(id = "inputs")
inputs_r <- inputs$server()
outputs <- ModOutputs$new(id = "outputs")
perf_r <- outputs$server(inputs_r = inputs_r)
download <- ModDownload$new(id = "download")
download$server(inputs_r = inputs_r, perf_r = perf_r)
}- 1
-
Instantiate input module; its
$server()returns a reactive list - 2
-
Instantiate output module; consume
inputs_rfrom step 1 - 3
-
Instantiate download module; consume both
inputs_randperf_r
Each module is instantiated fresh per session. There’s no global state, and reactive dependencies flow naturally between instances.
Using Hybrid {R6} (movexplR6)
In a hybrid app, the server function instantiates the R6 data layer once and wires function-based modules to it:
movies_server <- function(input, output, session) {
# R6 data layer (instantiated once per session)
movie_data <- MovieData$new("movies.db")
shiny::onStop(function() movie_data$disconnect())
# Function-based modules (stateless, simple)
filters <- mod_filters_server("filters")
# Reactive wrapper around R6 business logic
movies <- shiny::reactive({
movie_data$filter(
reviews = filters()$reviews,
oscars = filters()$oscars,
year = filters()$year,
boxoffice = filters()$boxoffice,
genre = filters()$genre,
director = filters()$director,
cast = filters()$cast
)
})
# Pass results to next module
mod_plot_server("plot", movies, filters)
}The R6 object owns the resource lifecycle; modules are simple and stateless.
Reactivity
R6 objects themselves are not reactive; they’re just containers for logic and state. To make an R6 module respond to user input, the server() method must return reactive expressions.
In stocktipr6’s ModInputs, the server() method returns a reactive list:
server = function() {
moduleServer(private$id, function(input, output, session) {
reactive({
list(
tickers = input$tickers,
from = input$dates[1],
to = input$dates[2],
vol_window = input$vol_window
)
})
})
}This reactive list is consumed by downstream modules:
# In ModOutputs$server()
server = function(inputs_r) {
moduleServer(private$id, function(input, output, session) {
prices_r <- eventReactive(inputs_r()$fetch, {
inp <- inputs_r()
get_stock_prices(
tickers = inp$tickers,
from = inp$from,
to = inp$to
)
})
})
}The dependency graph is explicit: downstream modules depend on upstream reactives.
In movexplR6, the pattern is similar; the R6 data layer is called from reactive expressions:
movies <- shiny::reactive({
movie_data$filter(
reviews = filters()$reviews,
oscars = filters()$oscars,
year = filters()$year
)
})When filter inputs change, movies() re-evaluates and calls movie_data$filter() with new parameters.
Documenting R6 Classes
As your app-package scales, teammates and users need to understand module and class interfaces. Documenting R6 classes with roxygen2 makes ?ModInputs or ?MovieData complete references. roxygen2 has supported R6 classes since version 7.0.0.
Class-level documentation
Start with roxygen comments above the R6Class() call:
hide/show ModInputs roxygen block
#' ModInputs: Shiny Input Module
#'
#' @description
#' Encapsulates input controls for stock ticker selection, date range, and
#' analysis parameters.
#'
#' @details
#' Bundles the UI and server logic for a reusable inputs module. Methods
#' handle namespace management automatically to prevent ID conflicts across
#' module instances. The private fields `id` and `ns` are managed internally;
#' callers interact only via public methods.
#'
#' @examples
#' if (interactive()) {
#' inputs <- ModInputs$new(id = "inputs")
#' # Note: server() only runs inside moduleServer() or shinyApp()
#' }
#'
#' @export
ModInputs <- R6::R6Class(
"ModInputs",
# ...
)- 1
- Title and class name
- 2
-
roxygentags; every line must follow a tag (no plain text intro allowed)
Method documentation
Document each public method inline, right before the method definition. Methods get their own subsection in the generated help page.
hide/show ModInputs methods
public = list(
#' @description
#' Initialize the module with a namespace ID.
#' @param id Character scalar; the module's namespace identifier.
#' @return A new `ModInputs` object.
initialize = function(id = "inputs") {
private$id <- id
private$ns <- NS(id)
},
#' @description
#' Build the module's UI.
#' @return HTML tags with namespaced input elements.
ui = function() {
sidebar(
selectizeInput(
inputId = private$ns("tickers"),
label = "Tickers",
choices = default_tickers(),
multiple = TRUE
),
# ...
)
},
#' @description
#' Start the server-side reactive logic.
#' @return A reactive list containing user selections.
server = function() {
moduleServer(private$id, function(input, output, session) {
reactive(list(
tickers = input$tickers,
dates = input$dates,
vol_window = input$vol_window
))
})
}
)- 1
-
Each method starts with
@description; remaining tags follow
R6 help pages
When we run devtools::document(), roxygen2 parses the #' blocks and generates the .Rd files with separate subsections for the class description, each public method, and examples. The help page becomes the module’s contract.
With roxygen2 and {R6} together, teammates can run ?ModInputs and immediately understand what the class does, the methods that are available, what parameters they accept, and what they return. This is much faster than reading through R/ModInputs.R.
%%{init: {'theme': 'base', 'themeVariables': { 'fontFamily': 'monospace', "darkMode":true}}}}%%
flowchart TD
subgraph Source["<strong>R/ModInputs.R</strong>"]
ClassBlock["Class block<br/><code>@description @details @export</code>"]
MethodBlock["Inline method blocks<br/><code>@description @param @return</code>"]
end
Document(["<strong>devtools::document()</strong>"])
Rd["<strong>man/ModInputs.Rd</strong><br/><em>Methods section,<br/>one subsection per method</em>"]
Namespace["<strong>NAMESPACE</strong><br/><code>export(ModInputs)</code>"]
Help(["<strong>?ModInputs</strong><br/><em>and pkgdown site</em>"])
ClassBlock --> Document
MethodBlock --> Document
Document --> Rd
Document --> Namespace
Rd --> Help
Namespace --> Help
style ClassBlock fill:#FFF8E7,color:#000000,stroke:#999,font-family:monospace
style MethodBlock fill:#FFF8E7,color:#000000,stroke:#999,font-family:monospace
style Document fill:#4CBB9D,color:#FFFFFF,rx:5,ry:5,font-family:monospace
style Rd fill:#FFFFFF,color:#000000,stroke:#333,font-family:monospace
style Namespace fill:#FFFFFF,color:#000000,stroke:#333,font-family:monospace
style Help fill:#4CBB9D,color:#FFFFFF,rx:5,ry:5,font-family:monospace
Documenting Business Logic Classes
When {R6} is used for data/business logic (like MovieData in movexplR6), focus documentation on public methods and lifecycle:
hide/show MovieData roxygen block
#' Movie Database Manager
#'
#' @description
#' Manages a SQLite database connection, loads a joined dataset from the
#' `omdb` and `tomatoes` tables, and applies filter logic derived from
#' Shiny input values.
#'
#' @details
#' On initialization the class opens a connection to the SQLite database at
#' `db_path`, joins the two tables via `inner_join()`, collects the result
#' into memory, and stores it in `$all_movies`. Call `$filter()` to obtain a
#' filtered data frame for rendering. Call `$disconnect()` to close the
#' connection explicitly; the private `finalize()` method also calls it when
#' the object is garbage collected.
#'
#' @export
MovieData <- R6::R6Class(
"MovieData",
public = list(
con = NULL,
all_movies = NULL,
#' @description Connect to the SQLite database and load all movie data.
#' @param db_path Path to the SQLite database file.
#' @return The initialized `MovieData` object invisibly.
initialize = function(db_path) { # ... },
#' @description Filter the in-memory data frame using input values.
#' @param reviews Minimum number of reviews.
#' @param oscars Minimum number of Oscar wins.
#' @param year Integer vector of length 2: `c(min_year, max_year)`.
#' @param boxoffice Numeric vector of length 2: box-office range in millions.
#' @param genre Genre string; `"All"` disables the filter.
#' @param director Partial director name; empty string disables the filter.
#' @param cast Partial cast name; empty string disables the filter.
#' @return A filtered data frame.
filter = function(reviews = 10, oscars = 0, year = c(1940, 2014),
boxoffice = c(0, 800), genre = "All",
director = "", cast = "") { # ... },
#' @description Explicitly close the database connection.
#' @return Returns `NULL` invisibly; called for side effects.
disconnect = function() { # ... }
)
)- 1
- Class title
- 2
- roxygen tags for class and methods
The key difference: business logic classes focus on method parameters, return types, and lifecycle (initialization, connection management, cleanup) rather than UI/namespace concerns.
Packaging best practices
File organization depends on which pattern you’re using.
For full R6 module patterns (like stocktipr6), use CamelCase names for classes and place each in its own file:
R/ModInputs.R # ModInputs class (one per file)
R/ModOutputs.R # ModOutputs class
R/ModDownload.R # ModDownload class
R/app_server.R # Wires modules together; instantiates objects
R/app_ui.R # Calls $ui() methods on each instanceFor hybrid patterns (like movexplR6), separate business logic classes from modules:
R/MovieData.R # Business logic R6 class
R/mod_filters.R # Function-based UI/server modules
R/mod_plot.R # Function-based UI/server modules
R/movies_server.R # Wires modules and R6 objects together
R/movies_ui.R # Composes UI from modulesIn both cases, export R6 classes with @export so package users can instantiate them. Never instantiate objects at package load time; always do it inside app_ui(), app_server(), or module server functions to ensure one instance per session.
Tests
Writing tests with testthat is especially valuable for R6 modules. I’ve found it’s worth testing that instantiation works, the methods return expected types, and that passing different id values produces properly isolated namespaces:
test_that("ModInputs instantiates with correct namespace", {
mod <- ModInputs$new(id = "test_inputs")
expect_equal(mod$.__enclos_env__$private$id, "test_inputs")
expect_is(mod$ui(), "shiny.tag")
})Recap
I’ve compared two approaches to using {R6} in Shiny app-packages:
stocktipr6 (Full R6 Modules)
- Each module is an
R6class with$ui()and$server()methods
- State (namespace ID) is private and shared across methods
- The UI and server share one
id, so their namespaces stay in sync
- Good for apps with complex module interdependencies
- Modules are reusable units; can be exported as a package API
movexplR6 (Hybrid {R6} + Functions)
- Modules stay function-based and lightweight
{R6}encapsulates business logic and resource management (database, API, caching)
- Developer must remember to pass the same
idto UI and server functions
- Good for apps with clear separation between UI and data layers
R6layer is testable and reusable; modules are app-specific
Both patterns solve real problems:
* R6 modules enforce architecture and prevent namespace bugs
* R6 business logic layers centralize resource management and complex state
Neither is universally better. Choose based on where your complexity lives and how you want to organize your codebase.
For working examples, explore:
* stocktipr6: mjfrigaard.github.io/stocktipr6
* movexplR6: mjfrigaard.github.io/movexplR6