Getting Started
This tutorial walks through installing splam, creating an account, and using the app end to end against cron.service. Follow the steps in order and by the end you’ll have 1) logged in, 2) restarted a service with a documented reason, and 3) seen that action appear in the audit trail.
1. Install
splam installs into a virtual environment. On Debian-based systems (Pop!_OS, Ubuntu, Debian) this isn’t optional because the system Python is marked externally managed under PEP 668, and installing against it fails with externally-managed-environment.
First clone the repo, then create the .venv and install:
git clone https://github.com/mjfrigaard/splam.git
cd splam
python3 -m venv .venv
.venv/bin/pip install -e .
That installs Shiny alongside splam and places splam-users and shiny in .venv/bin/. Now, activate the environment:
source .venv/bin/activateThe remaining steps assume the virtual environment isactivated. If you’d rather not activate, prefix each command with .venv/bin/ instead.
2. Create an account
The app has no default account, so create one with the bundled CLI:
splam-users add adminEnter a password twice when prompted. This creates an admin account (which is what the rest of the tutorial assumes). Read-only auditor accounts are covered in the how-to guide.
3. Start the app
shiny run splam.app:app --reloadINFO: Will watch for changes in these directories: ['/path/to/splam']
INFO: Uvicorn running on http://127.0.0.1:8000 (Press CTRL+C to quit)
INFO: Started reloader process [11105] using WatchFiles
INFO: Started server process [11154]
INFO: Waiting for application startup.
INFO: Application startup complete.Open the printed URL (typically http://127.0.0.1:8000) in your browser.
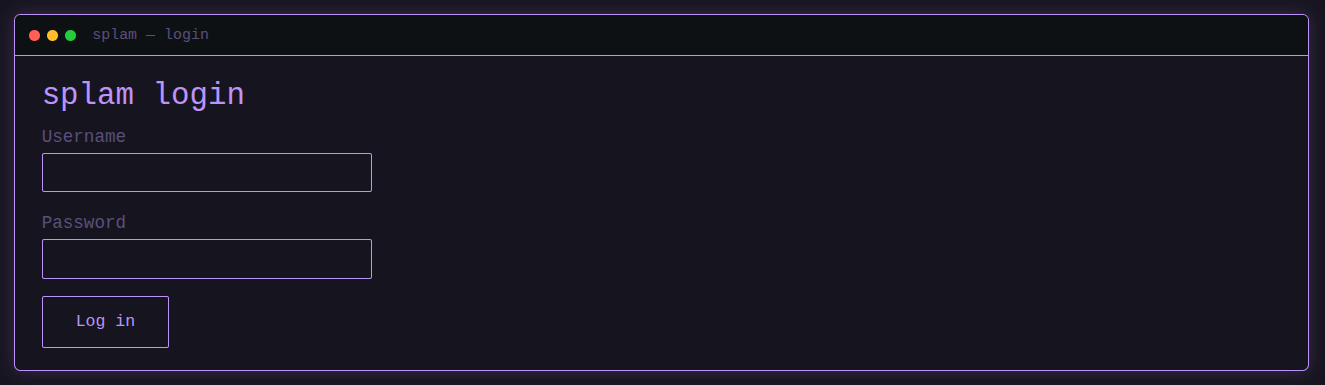
4. Log in
Enter the username and password you created in step 2 and select Log in.
5. Select cron.service
Use the Service dropdown in the sidebar to choose cron.service. The dropdown lists every .service unit systemd found on this host, so it’s a long list.
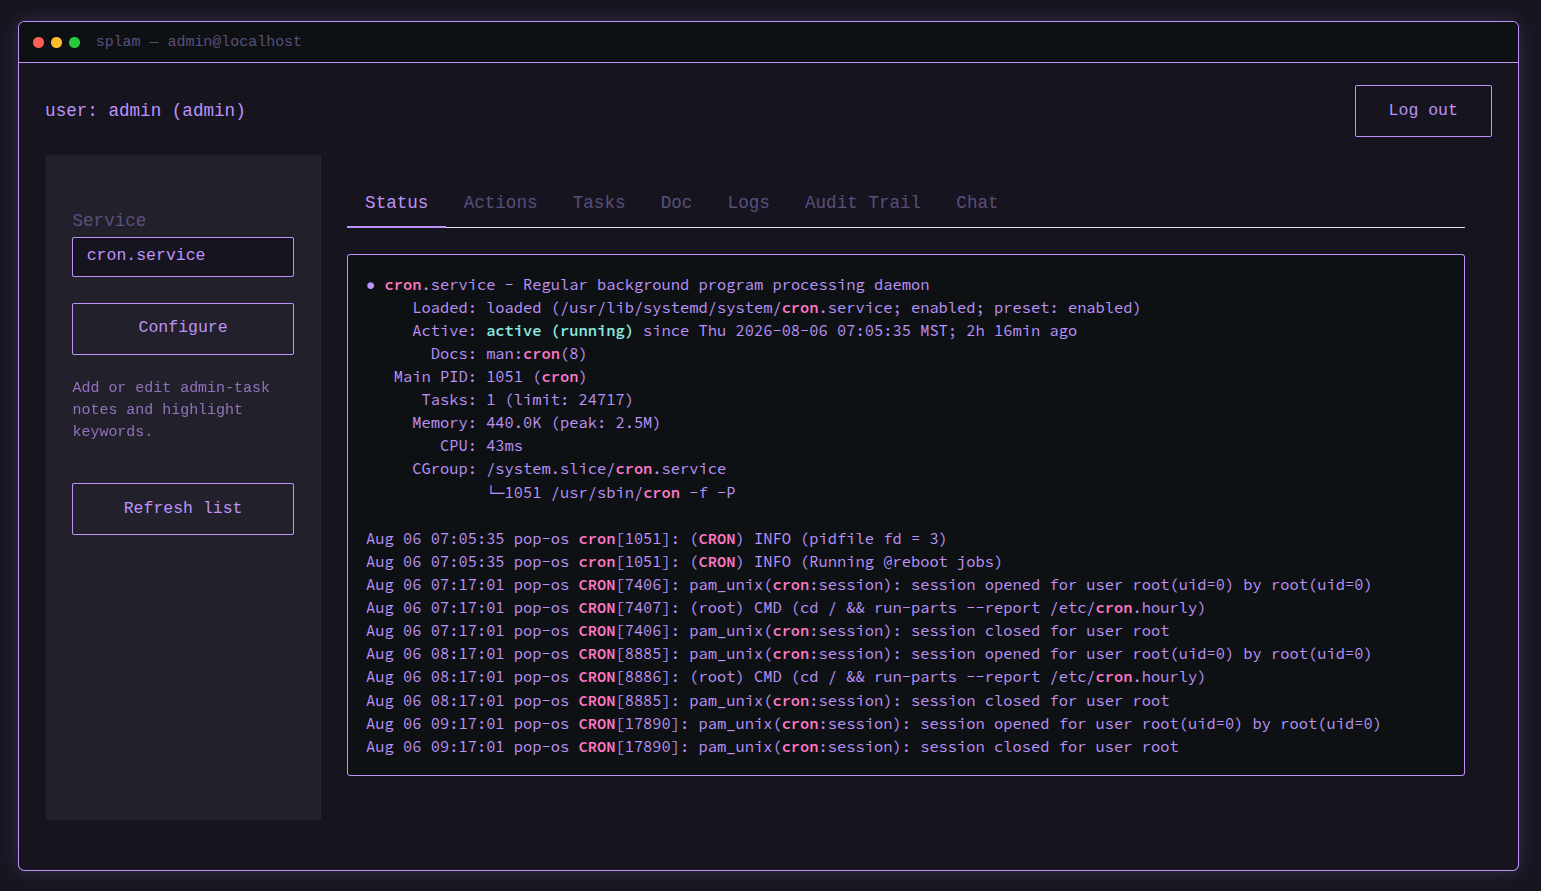
Six tabs are available to an admin account (an auditor account sees the same set without Actions):
- Status: live
systemctl statusoutput - Actions: the Reason field and the Start/Stop/Restart buttons
- Tasks: admin-task notes for the selected service
- Doc: the service’s own documentation, from the unit file
- Logs: recent
journalctlentries, newest first - Audit Trail: a record of actions taken on this service through the app
Open the Tasks tab and read through cron’s purpose, checks, coommon issues, and compliance note. Then open Doc, which prints cron(8) because cron.service names it in Documentation=.
6. Restart it with a reason
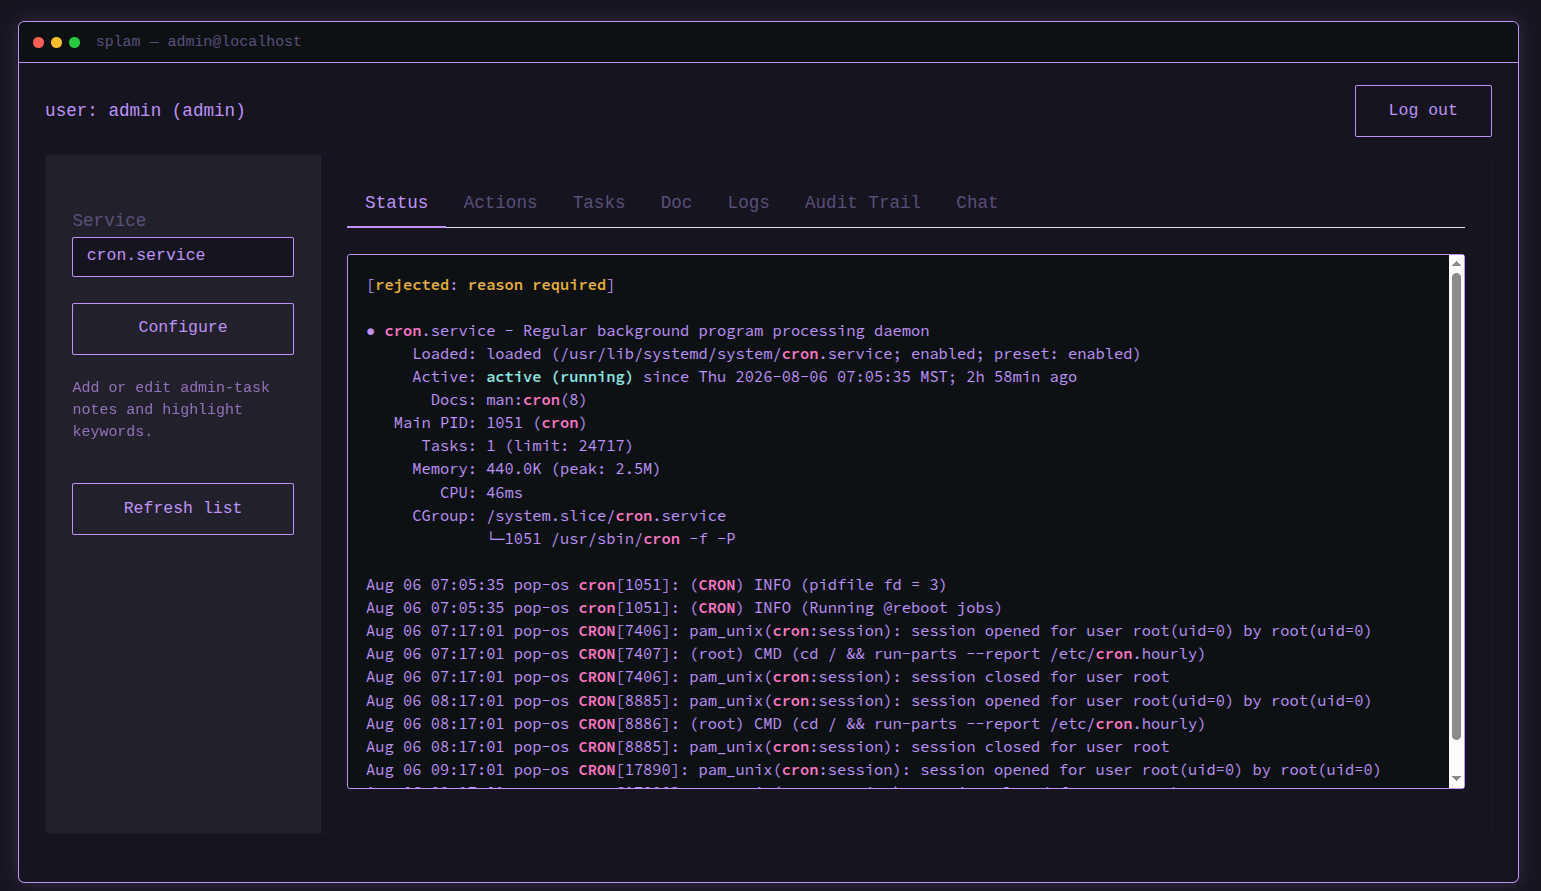
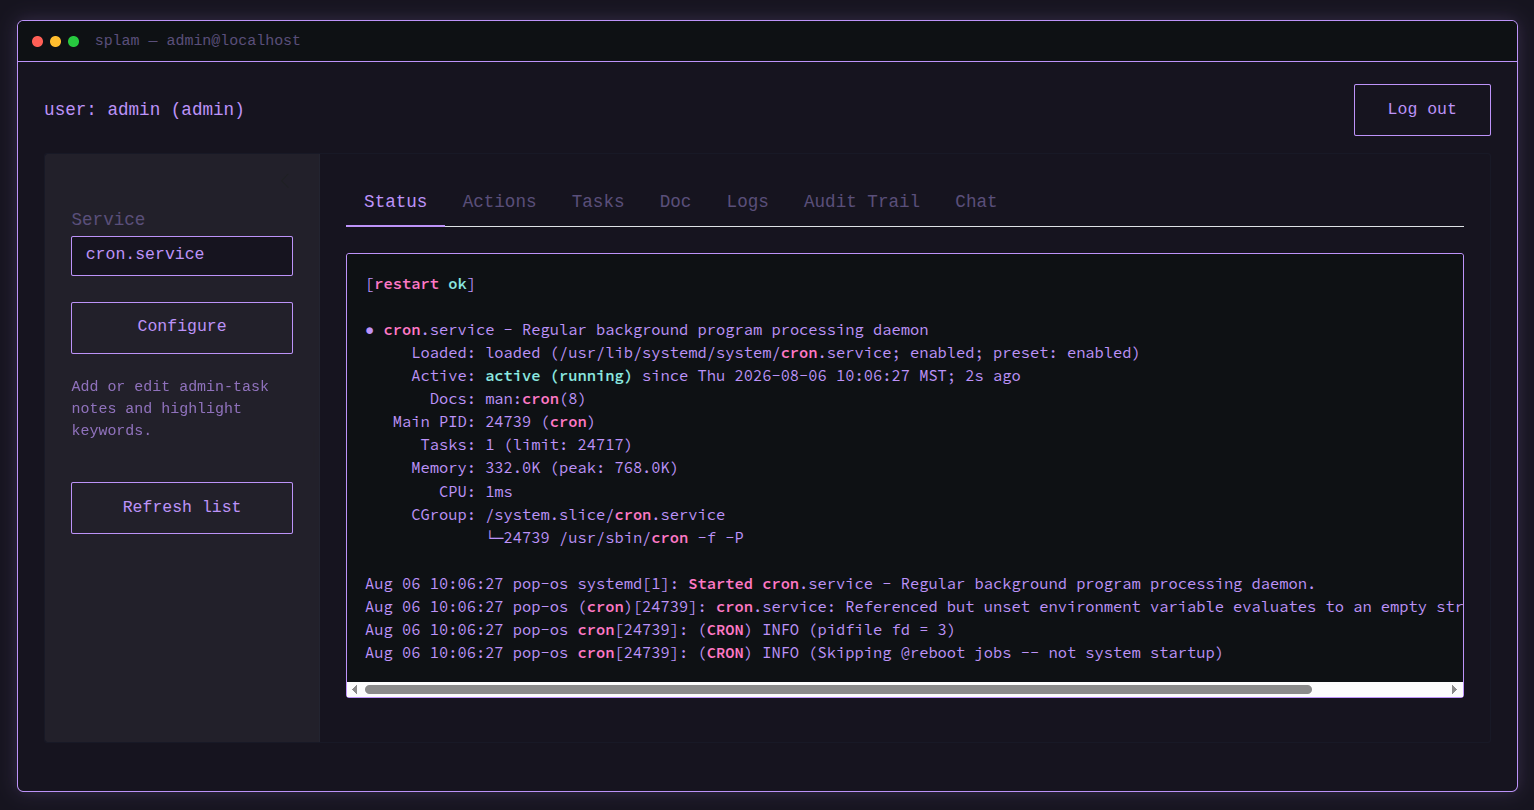
Switch to the Actions tab and click Restart without filling in the Reason field. The action is blocked and the Status tab shows [rejected: reason required]. You will see this in the Audit Trail tab as well.
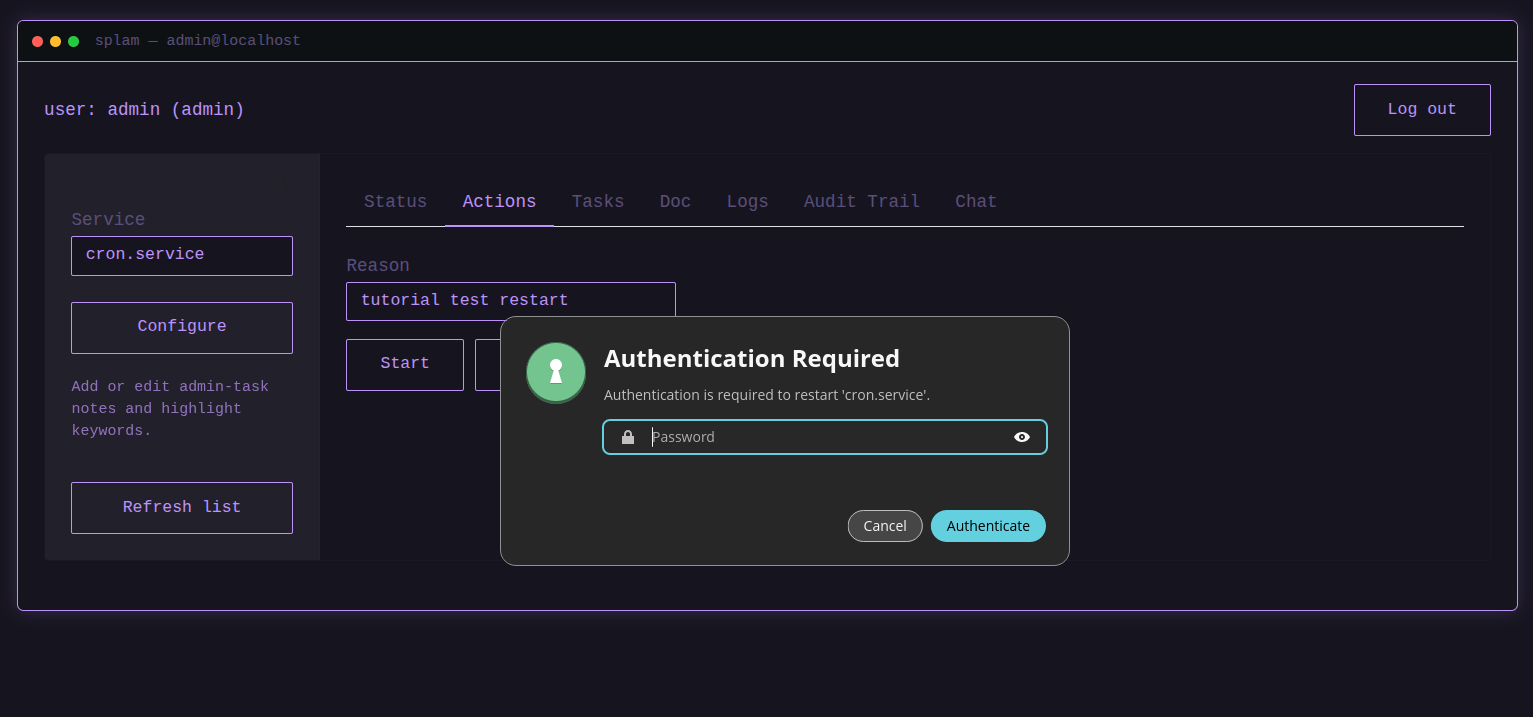
Now type a reason (e.g. tutorial test restart) into Reason and click Restart again. You’ll be asked to authenticate.
Switch back to the Status tab to see the result.
7. Confirm it landed in the audit trail
Switch to the Audit Trail tab. You should see a new entry with your username, the action, the reason you gave, and a timestamp.

8. Search the logs
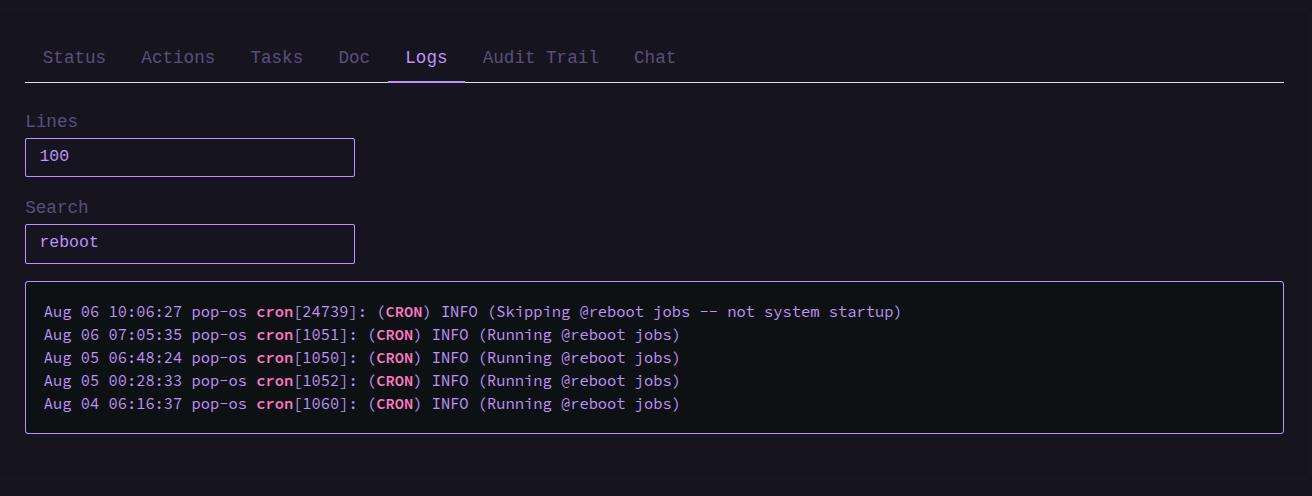
Switch to the Logs tab, set Lines if you want more history, and type CRON into Search. The output narrows to lines containing that term (case-insensitive). Notice that words like error, started, and stopped are already highlighted in the output (no search needed to spot them).
Next steps
- How-To Guides for specific tasks (managing accounts, extending service info, adding highlight keywords, rebuilding the docs).
- Explanation for the reasoning behind the login model, the audit trail, and the app’s structure.