devtools::test()18 System tests
NoteTLDR 
shinytest2 streamlines and enhances system testing for Shiny applications, making it easier to ensure your app works flawlessly inside your app-package:
Use
record_test()to capture user interactions and generate tests without writing code manually.Leverage
AppDriver$new()for scripting and automating tests, making it simpler to test complex user scenarios.Apply
exportTestValues()andtest.modeto access and assess internal app states, offering a deeper testing perspective.
BDD functions
Use
describe()andit()to add features and sceanrios in test files.describe('Feature...', code = { it('Scenario...', code = { ... }) })
This chapter covers using shinytest2 and testthat to perform system tests on the features and scenarios in your app-package.
“Failure to allow enough time for system test, in particular, is peculiarly disastrous. Since the delay comes at the end of the schedule, no one is aware of schedule trouble until almost the delivery date. Bad news, late and without warning, is unsettling to customers and to managers.” - ‘The Mythical Man-Month’, Frederick P. Brooks Jr.
System (or end-to-end) tests simulate real user interactions in a ‘pre-production’ environment to verify the whole application (or system) works.1 Approaches to system testing vary, but in general, we’ll want to run a system test for each feature in our application before a release.
If we’ve been documenting our unit and integration tests with BDD feature and scenario descriptions, the system tests can be used to confirm the functional requirements for the primary execution path (or user experience) before release.
18.1 Current tests
Launch app with the shinypak package:
launch('17_test-modules')The current files in our tests folder are below:
tests
├── testthat
│   ├── _snaps
│   │   └── text_logo.md
│   ├── fixtures
│   │   ├── make-tidy_ggp2_movies.R
│   │   └── tidy_ggp2_movies.rds
│   ├── helper.R
│   ├── setup-shinytest2.R
│   ├── test-mod_scatter_display_server.R
│   ├── test-mod_var_input_server.R
│   ├── test-scatter_plot.R
│   └── test-text_logo.R
└── testthat.R

4 directories, 10 files
The output from devtools::test() is below:
✔ | F W  S  OK | Context
⠏ |          0 | mod_scatter_display_server
TEST: START [2025-02-12 07:47:04] COLLECT = collected module values

TEST: END [2025-02-12 07:47:04] COLLECT = collected module values

TEST: START [2025-02-12 07:47:04] OUTPUT = is list
⠙ |          2 | mod_scatter_display_server
TEST: END [2025-02-12 07:47:04] OUTPUT = is list

TEST: START [2025-02-12 07:47:04] OUTPUT = names

TEST: END [2025-02-12 07:47:04] OUTPUT = names

TEST: START [2025-02-12 07:47:04] OUTPUT = Plot object
⠸ |          4 | mod_scatter_display_server
TEST: END [2025-02-12 07:47:04] OUTPUT = Plot object

TEST: START [2025-02-12 07:47:04] OUTPUT = is ggplot

TEST: END [2025-02-12 07:47:04] OUTPUT = is ggplot
✔ |          5 | mod_scatter_display_server
⠏ |          0 | mod_var_input_server
TEST: START [2025-02-12 07:47:05] RETURNED = test_vals vs. session$returned()

TEST: END [2025-02-12 07:47:05] RETURNED = test_vals vs. session$returned()
✔ |          1 | mod_var_input_server
⠏ |          0 | scatter_plot
TEST: START [2025-02-12 07:47:05] Step1 = loading movies data

TEST: END [2025-02-12 07:47:05] Step1 = movies data loaded successfully

TEST: START [2025-02-12 07:47:05] Step2 = creating graph

TEST: END [2025-02-12 07:47:05] Step2 = graph created
✔ |          1 | scatter_plot
⠏ |          0 | text_logo
TEST: START [2025-02-12 07:47:05] snap = text_logo()

TEST: END [2025-02-12 07:47:05] snap = text_logo()

TEST: START [2025-02-12 07:47:05] snap = text_logo('})')
⠙ |          2 | text_logo
TEST: START [2025-02-12 07:47:05] snap = text_logo('h1')

TEST: START [2025-02-12 07:47:05] snap = text_logo('invalid')

TEST: END [2025-02-12 07:47:05] snap = text_logo('invalid')
✔ |          3 | text_logo

══ Results ════════════════════════════════════════════════════════════════
Duration: 1.8 s

[ FAIL 0 | WARN 0 | SKIP 0 | PASS 10 ]


Nice code.
18.2 Setting up shinytest2
shinytest2 requires a few steps to get up and running (most notably the chromote package), but you’ll find excellent documentation on the package website.2
The shinytest2::use_shinytest2() performs the following setup steps:
✔ Adding
shinytest2::load_app_env()totests/testthat/setup-shinytest2.R✔ Adding
*_.new.pngto.gitignore✔ Adding
_\\.new\\.png$to.Rbuildignore✔ Adding
shinytest2toSuggestsfield inDESCRIPTION
We also get some advice on using shinytest2 functions in our code:
• In your package code, use `rlang::is_installed("shinytest2")` or
  `rlang::check_installed("shinytest2")` to test if shinytest2 is installed
• Then directly refer to functions with `shinytest2::fun()`
After setting up shinytest2, be sure you can create a new chromote session like the one below:
library(chromote)
b <- ChromoteSession$new()
b$view()
Chromote session
If you run into problems running shinytest2 tests, you can upgrade chromium (if you’re on Mac using homebrew):
brew install --cask chromium18.3 Record a test
If we launch the test recorder with shinytest2::record_test(), change the inputs in our application, click on Expect Shiny values and Save test and exit, a test is recorded to a new test file: tests/testthat/test-shinytest2.R
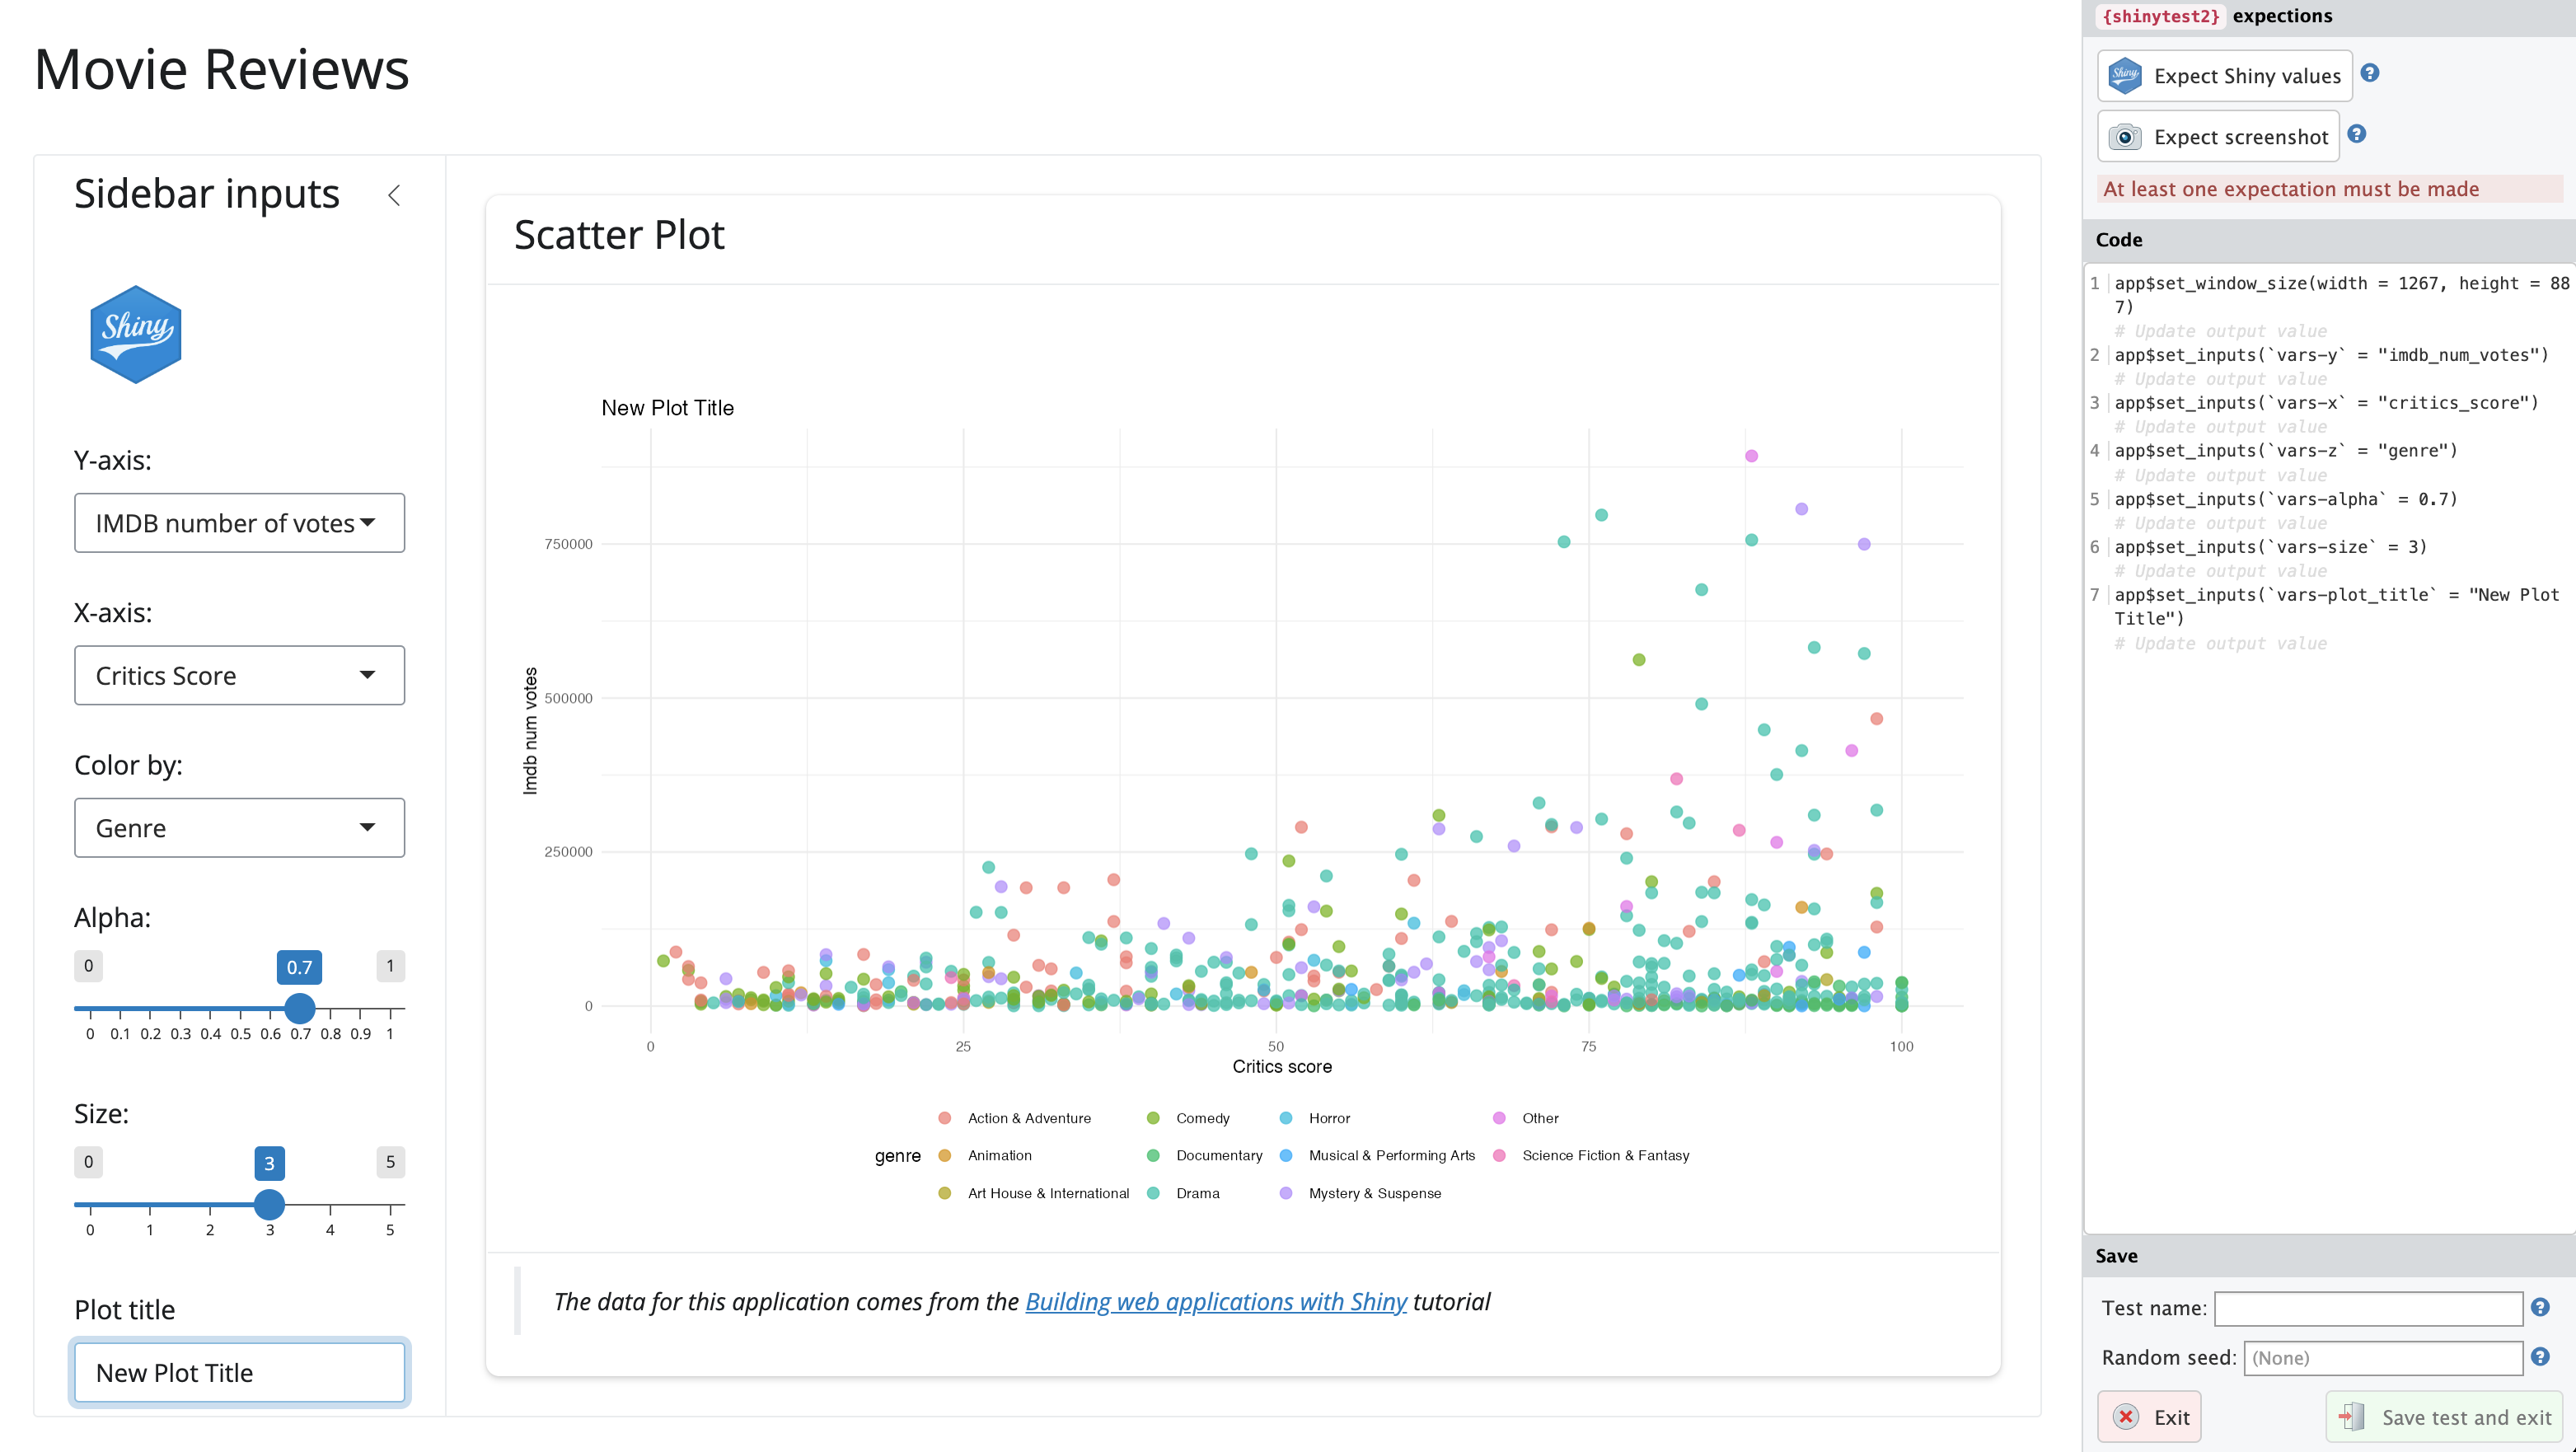
shinytest2::record_test()The test runs and saves the PNG snapshot and test values to the tests/testthat/_snaps/ folder:
Loading required package: shiny
[ FAIL 0 | WARN 2 | SKIP 0 | PASS 1 ]

── Warning (test-shinytest2.R:10:3): {shinytest2} recording: sap-feature-01 ────────
Adding new file snapshot: 'tests/testthat/_snaps/sap-feature-01-001_.png'

── Warning (test-shinytest2.R:10:3): {shinytest2} recording: sap-feature-01 ────────
Adding new file snapshot: 'tests/testthat/_snaps/sap-feature-01-001.json'

[ FAIL 0 | WARN 2 | SKIP 0 | PASS 1 ]If we view the contents test-shinytest2.R we find each action we performed in the test recorder has a corresponding call in the test:
library(shinytest2)
test_that("{shinytest2} recording: sap-feature-01", {
app <- AppDriver$new(name = "sap-feature-01", height = 887, width = 1241)
app$set_inputs(`vars-y` = "imdb_num_votes")
app$set_inputs(`vars-x` = "critics_score")
app$set_inputs(`vars-z` = "genre")
app$set_inputs(`aes-alpha` = 0.7)
app$set_inputs(`aes-size` = 3)
app$set_inputs(`aes-plot_title` = "New plot title")
app$expect_values()
})- 1
-
Initialize the
AppDriver$new()with the name of the test and the dimensions of the Chromium browser.
- 2
-
Change the y axis (
vars-y) to ‘IMBD number of votes’ (imdb_num_votes)
- 3
-
Change the x axis (
vars-x) to ‘Critics Score’ (critics_score)
- 4
-
Change the color by (
vars-z) to ‘Genre’ (genre)
- 5
-
Change the point opacity (
aes-alpha) to ‘0.7’
- 6
-
Change the point size (
aes-alpha) to ‘3’
- 7
-
Change the plot title to (
aes-plot_title) to ‘New plot title’ - 8
- Export the test values
We’ll use this initial test as a template for writing the steps in our test Scenarios.
18.4 shinytest2 and BDD
There are multiple ways to approach your test layout with testthat’s describe(), it() and/or test_that() functions. Below is an example with dedicated Feature and Scenario descriptions, and a reference to the feature number in an it() call:
describe("Feature 1: Scatter plot data visualization dropdowns
           As a film data analyst
           I want to explore variables in the movie review data
           So that I can analyze relationships between movie reivew sources", {

describe("Scenario: Change dropdown values for plotting
            Given the movie review application is loaded
            When I choose the variable [ ] for the x-axis
            And I choose the variable [ ] for the y-axis
            And I choose the variable [ ] for the color
            And I choose the size of the points to be [ ]
            And I choose the opacity of the points to be [ ]
            And I enter '[ ]' for the plot title

            Then the scatter plot should show [ ] on the x-axis
            And the scatter plot should show [ ] on the y-axis
            And the points on the scatter plot should be colored by [ ]
            And the size of the points on the scatter plot should be [ ]
            And the opacity of the points on the scatter plot should be [ ]
            And the title of the plot should be '[ ]'", {

              it("Feature 01", {
                    app <- AppDriver$new(name = "feature-01",
                                       height = 800, width = 1173)
                  app$set_inputs(`vars-y` = "imdb_num_votes")
                  app$set_inputs(`vars-x` = "critics_score")
                  app$set_inputs(`vars-z` = "genre")
                  app$set_inputs(`aes-alpha` = 0.7)
                  app$set_inputs(`aes-size` = 3)
                  app$set_inputs(`aes-plot_title` = "New plot title")
                  app$expect_values()
              })
      })
})
With this approach, you can create the test file as soon as you have a Feature description (and come back later to fill in the Scenarios and tests).
An alternative approach is to use nested describe() functions with each Then step in the it() call (these are what will actually be tested):
library(shinytest2)
describe("Feature 1: Scatter plot data visualization dropdowns
As a film data analyst
I want to explore variables in the movie review data
So that I can analyze relationships between movie review sources", {
describe("Scenario A: Change dropdown values for plotting
Given the movie review application is loaded
When I choose the variable [ ] for the x-axis
And I choose the variable [ ] for the y-axis
And I choose the variable [ ] for the color", {
it("Then the scatter plot should show [ ] on the x-axis
And the scatter plot should show [ ] on the y-axis
And the points on the scatter plot should be colored by [ ]", {
app <- AppDriver$new(name = "feature-01-scenario-a",
height = 800, width = 1173)
app$set_inputs(`vars-y` = "imdb_num_votes")
app$set_inputs(`vars-x` = "critics_score")
app$set_inputs(`vars-z` = "genre")
app$expect_values()
})
})
describe("Scenario B: Change dropdown values for plotting
Given the movie review application is loaded
When I choose the size of the points to be [ ]
And I choose the opacity of the points to be [ ]
And I enter '[ ]' for the plot title", {
it("Then the size of the points on the scatter plot should be [ ]
And the opacity of the points on the scatter plot should be [ ]
And the title of the plot should be '[ ]'", {
app <- AppDriver$new(name = "feature-01-scenario-b",
height = 800, width = 1173)
app$set_inputs(`aes-alpha` = 0.7)
app$set_inputs(`aes-size` = 3)
app$set_inputs(`aes-plot_title` = "New plot title")
app$expect_values()
})
})
})- 1
-
Test for scenario A
- 2
- Test for scenario B
An important note with this approach is the different names for each AppDriver$new() (otherwise we’d be overwriting the previous snapshot/values).
18.4.1 Testing multiple apps
If we want to test a feature for one of our alternative applications in the inst/ folder, we can use system.file() to pass their location to the app_dir argument of AppDriver$new().
In the test below, the scenario describes changing inputs for x, y, and color:
library(shinytest2)
describe(
"Feature 1: Scatter plot data visualization dropdowns
As a film data analyst
I want to explore movie review variables
So that I can analyze relationships between movie attributes and ratings", {
describe(
"Scenario: Change dropdown values for plotting
Given the movie review application is loaded
When I choose the variable ['Critics Score'] for the x-axis
And I choose the variable ['IMDB number of votes'] for the y-axis
And I choose the variable ['Genre'] for the color", code = {
it("Then the scatter plot should show ['Critics Score'] on the x-axis
And the scatter plot should show ['IMDB number of votes'] on the y-axis
And the points on the scatter plot should be colored by ['Genre']", {
test_logger(start = 'prod-feat-01', msg = "update x, y, and z")
app <- AppDriver$new(system.file("prod/app", package = "sap"),
name = "prod-feat-01",
wait = FALSE, timeout = 3000,
height = 800, width = 1173)
app$set_inputs(`vars-y` = "imdb_num_votes")
app$set_inputs(`vars-x` = "critics_score")
app$set_inputs(`vars-z` = "genre")
app$set_inputs(`aes-alpha` = 0.7)
app$set_inputs(`aes-size` = 3)
app$set_inputs(`aes-plot_title` = "New plot title")
app$expect_values()
test_logger(end = 'prod-feat-01', msg = "update x, y, and z")
})
})
})- 1
-
Use
system.file()to access application ininst/tidy-data
- 2
-
Adjust the
waitandtimeoutso the test will run
Note that I’ve changed the wait and timeout arguments in AppDriver$new() because this tests takes over 10 seconds to complete (which I can see with my test_logger() output). When I confirm this in the output png file, I can see the x, y, and color values have been changed (and the missing values have been removed).
tests/testthat/_snaps/prod-feat-01-001_.png'18.5 The test.mode option
We’ve included an argument in both of the standalone app functions to allow for options to be passed to shinyApp():
launch_app(options = list())If we’re testing our application, we can include the test.mode = TRUE option, which will return any values passed to exportTestValues():
launch_app(options = list(test.mode = TRUE), run = 'p')We can also include this in our .Rprofile as:3
options(shiny.testmode = TRUE)18.6 Exporting test values
To export values, place the name of exported reactive values in curly brackets ({}). Below is an example using the inputs() reactive object in the mod_scatter_display_server():
exportTestValues(
   x = { inputs()$x },
   y = { inputs()$y },
   z = { inputs()$z },
   alpha = { inputs()$alpha },
   size = { inputs()$size },
   title = { inputs()$plot_title }
  )
In our test, we can create the AppDriver$new() object, extract the values with get_values():
app <- AppDriver$new(name = "test-values",
                     height = 800, width = 1173,
                     wait = FALSE, timeout = 300000)

test_values <- app$get_values()

test_values[['export']]
$`plot-alpha`
[1] 0.5
$`plot-size`
[1] 2
$`plot-title`
[1] ""
$`plot-x`
[1] "imdb_rating"
$`plot-y`
[1] "audience_score"
$`plot-z`
[1] "mpaa_rating"Now we can write tests against any of the exported values:
expect_equal(object = test_values[['export']]$`plot-alpha`, expected = 0.5)
expect_equal(object = test_values[['export']]$`plot-size`, expected = 2)
expect_equal(object = test_values[['export']]$`plot-title`, expected = "")
expect_equal(object = test_values[['export']]$`plot-x`, expected = "imdb_rating")
expect_equal(object = test_values[['export']]$`plot-y`, expected = "audience_score")
expect_equal(object = test_values[['export']]$`plot-z`, expected = "mpaa_rating")
18.7 Test failures
In Positron ![]() , the Testing menu item gives us a display of the test files and individual tests.
, the Testing menu item gives us a display of the test files and individual tests.
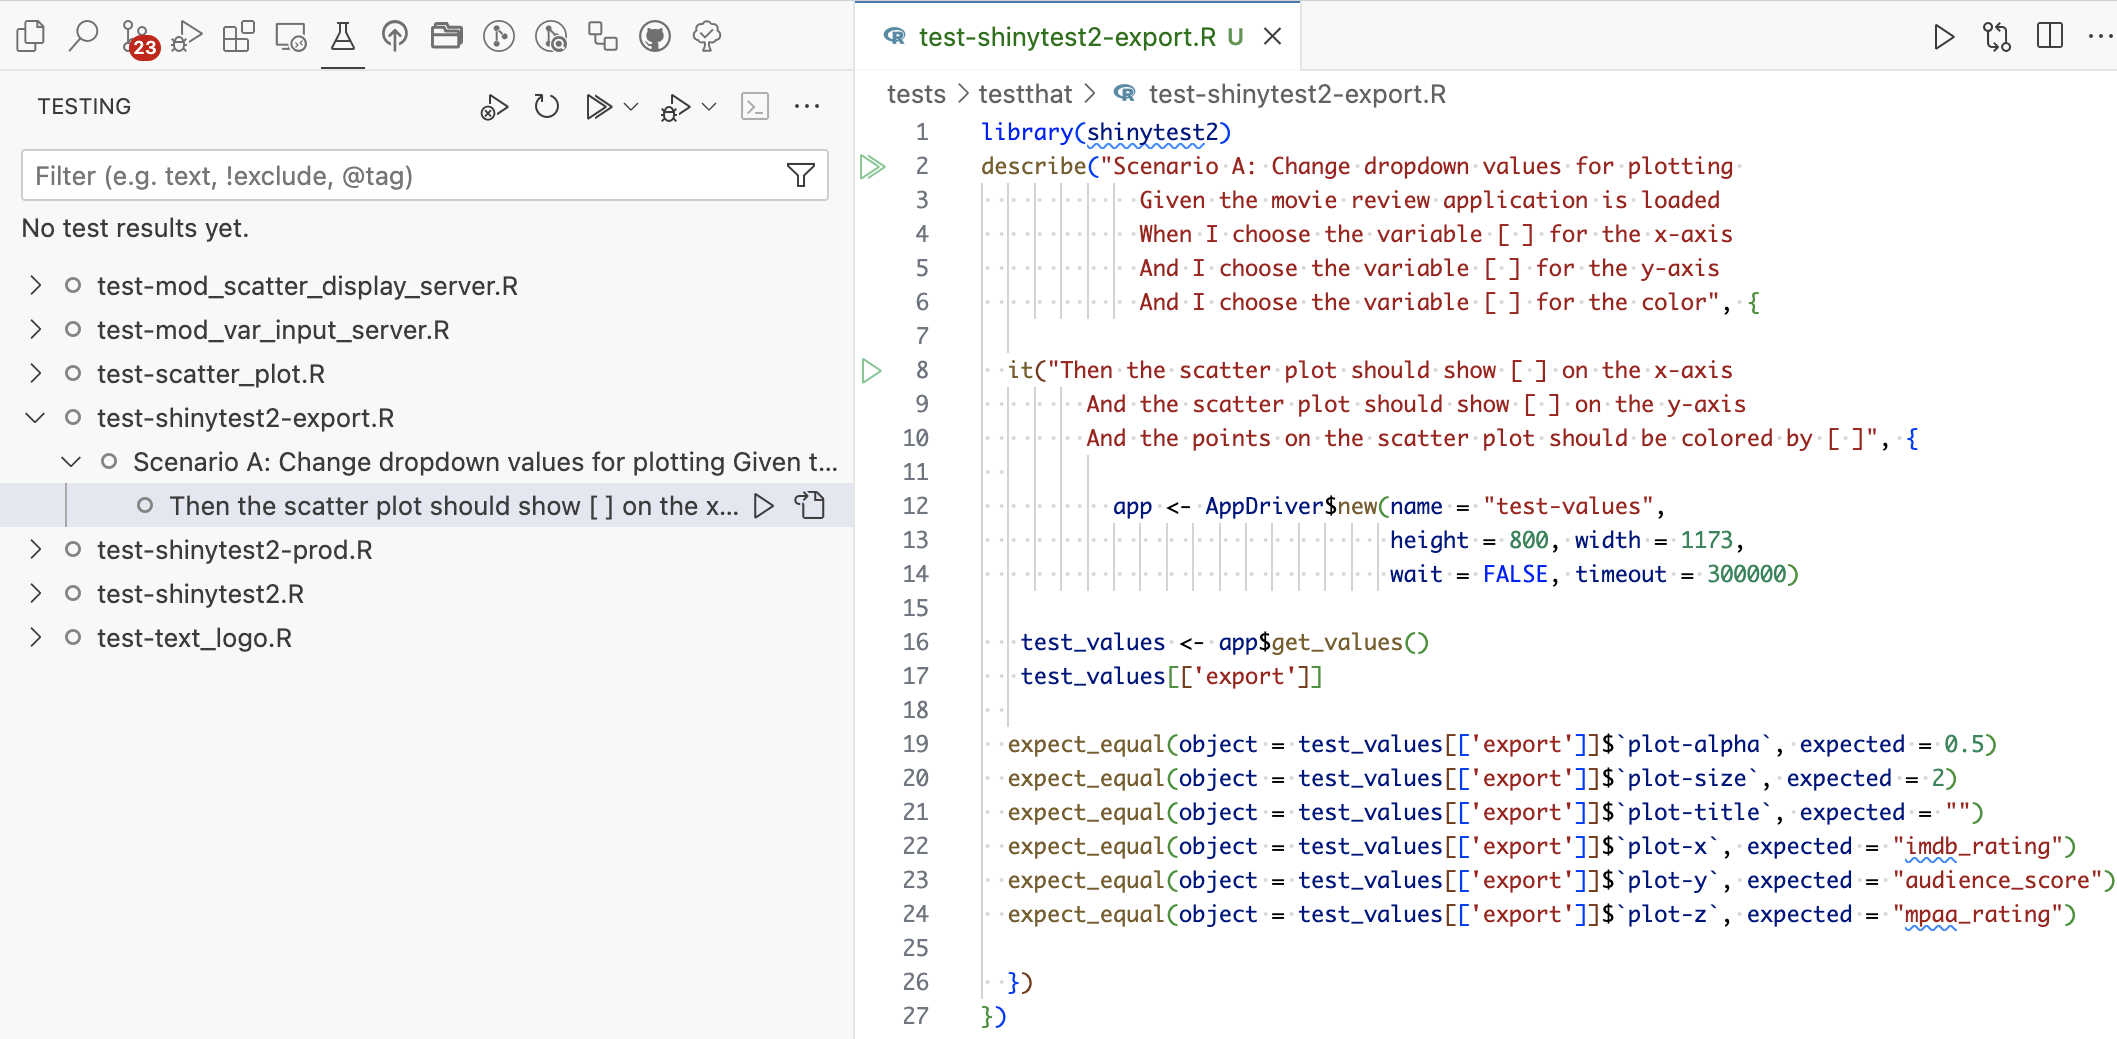
When a test fails, we’re alerted of the failure and the specific test the output didn’t meet the expectation:
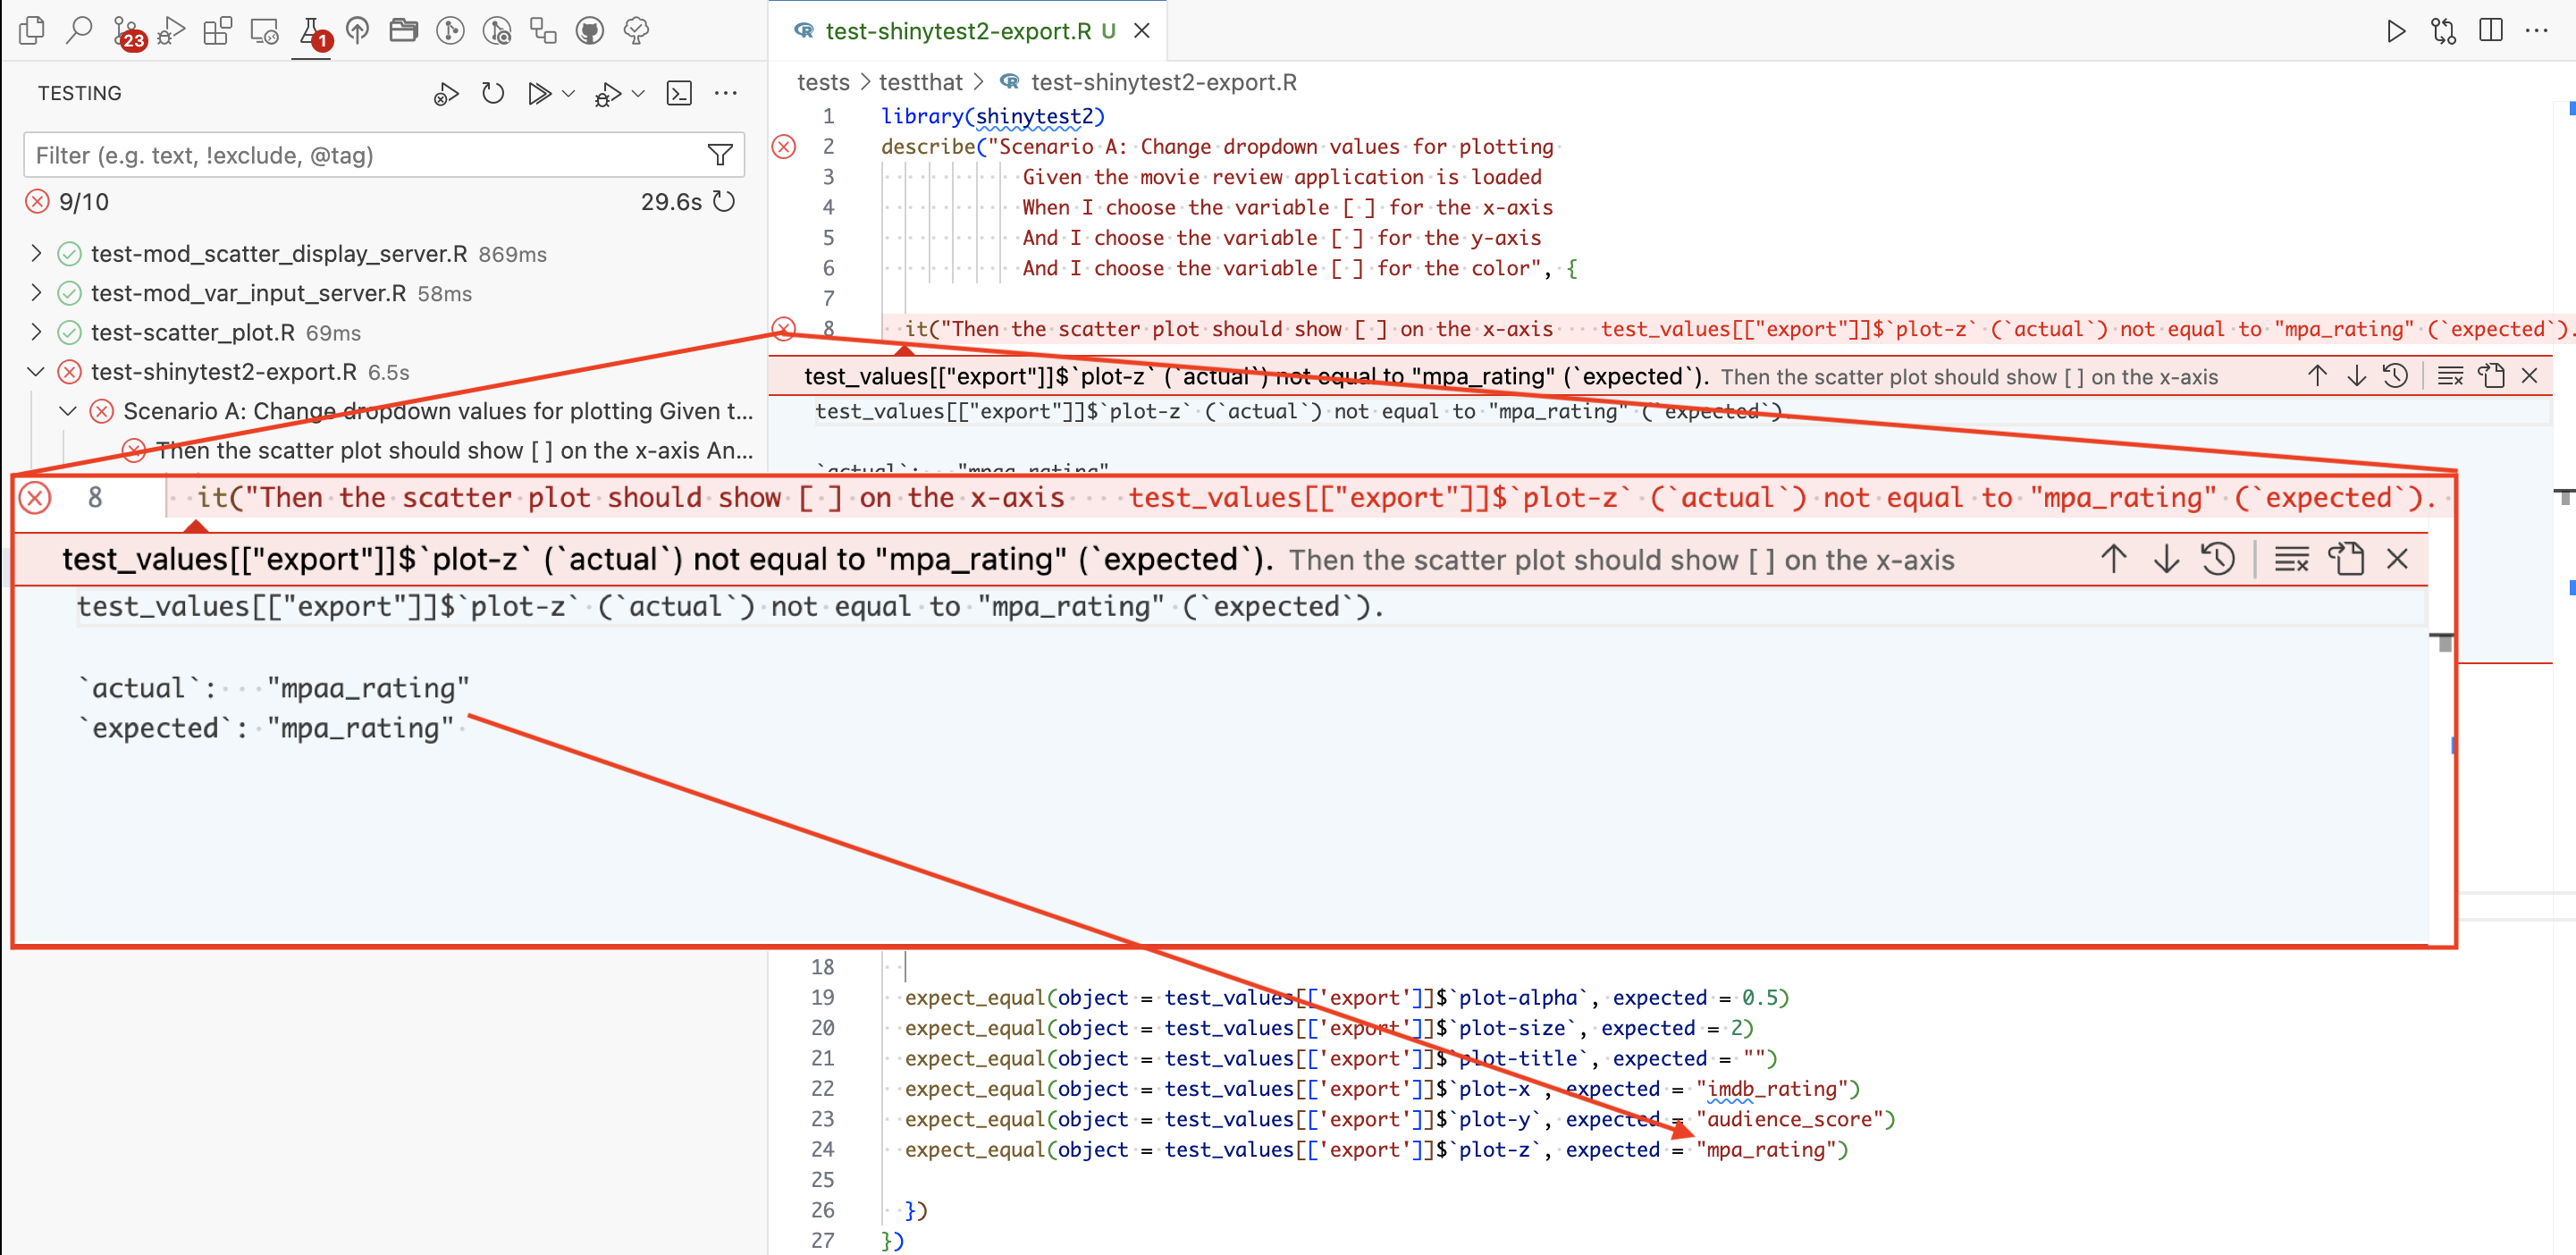
In this case, we can see it’s just a typo in the expected output. After making the change, we can re-run the tests and view the output in the TEST RESULTS:

TEST RESULTS also keeps a record of the previous test runs for us to review.
18.8 Test _snaps/
After writing our system tests and running devtools::test(), the tests/testthat/_snaps/ folder contains the follow folders and files:
tests/testthat/_snaps/
├── shinytest2
│   ├── feature-01-scenario-a-001.json
│   ├── feature-01-scenario-a-001_.png
│   ├── feature-01-senario-b-001.json
│   └── feature-01-senario-b-001_.png
├── shinytest2-prod
│   ├── prod-feat-01-001.json
│   └── prod-feat-01-001_.png
└── text_logo.md

3 directories, 7 files
These outputs correspond to the test files that create snapshots in the tests/testthat/ folder:
tests/testthat/
├── test-shinytest2-export.R
├── test-shinytest2-prod.R
└── test-shinytest2.RLaunch app with the shinypak package:
launch('18_tests-system')Recap
Adopting a behavior-driven development approach in system testing can help to fill the gulf between non-technical stakeholders and developers by encouraging natural, descriptive language. Using complete sentences to describe to define and communicate the application requirements will make it easier for anyone to catch unexpected behaviors.
Using ‘Features’ (As a , I want, So that) and ‘Scenarios’ (Given, When, Then) make system tests clear (and easier to update if the specifications change).
TipRecap
System tests
record_test()simplifies the creation of system tests by recording interactions with your Shiny app.- Using
record_test()accelerates test creation and ensures our tests accurately reflect user behavior, making it easier to catch issues that could affect user experience.
- Using
- Use
AppDriver$new()to manually create tests for more control and customization.- Scripting tests with
shinytest2allows for detailed user interactions and testing specific functionalities in isolation or under unique conditions, offering a granular approach to system testing.
- Scripting tests with
- Use
exportTestValues()in tandem withtest.modeto expose and verify the internal state of a Shiny app during tests.- This technique is crucial for testing the logic and data behind your app’s UI, ensuring that the app looks right and operates correctly under various scenarios.
BDD functions
Using
testthat’s BDD functions makes system tests easier to update if the features and scenarios change.- Capturing the application’s desired behaviors in
Features(As a , I want, So that) andScenarios(Given, When, Then) provides a testing script that’s clear and easy to follow.
- Capturing the application’s desired behaviors in
use
describe()andit()to add features and sceanrios in test files.describe('Feature...', code = { it('Scenario...', code = { ... }) })
System tests should strive to replicate the production conditions, even when/if it’s not possible to perfectly replicate the environment.↩︎
A great place to start is the Getting Started vignette.↩︎
We covered the
.Rprofilein Section 4.7.3.↩︎